Showing posts with label Roof. Show all posts

Sunday, 28 July 2019

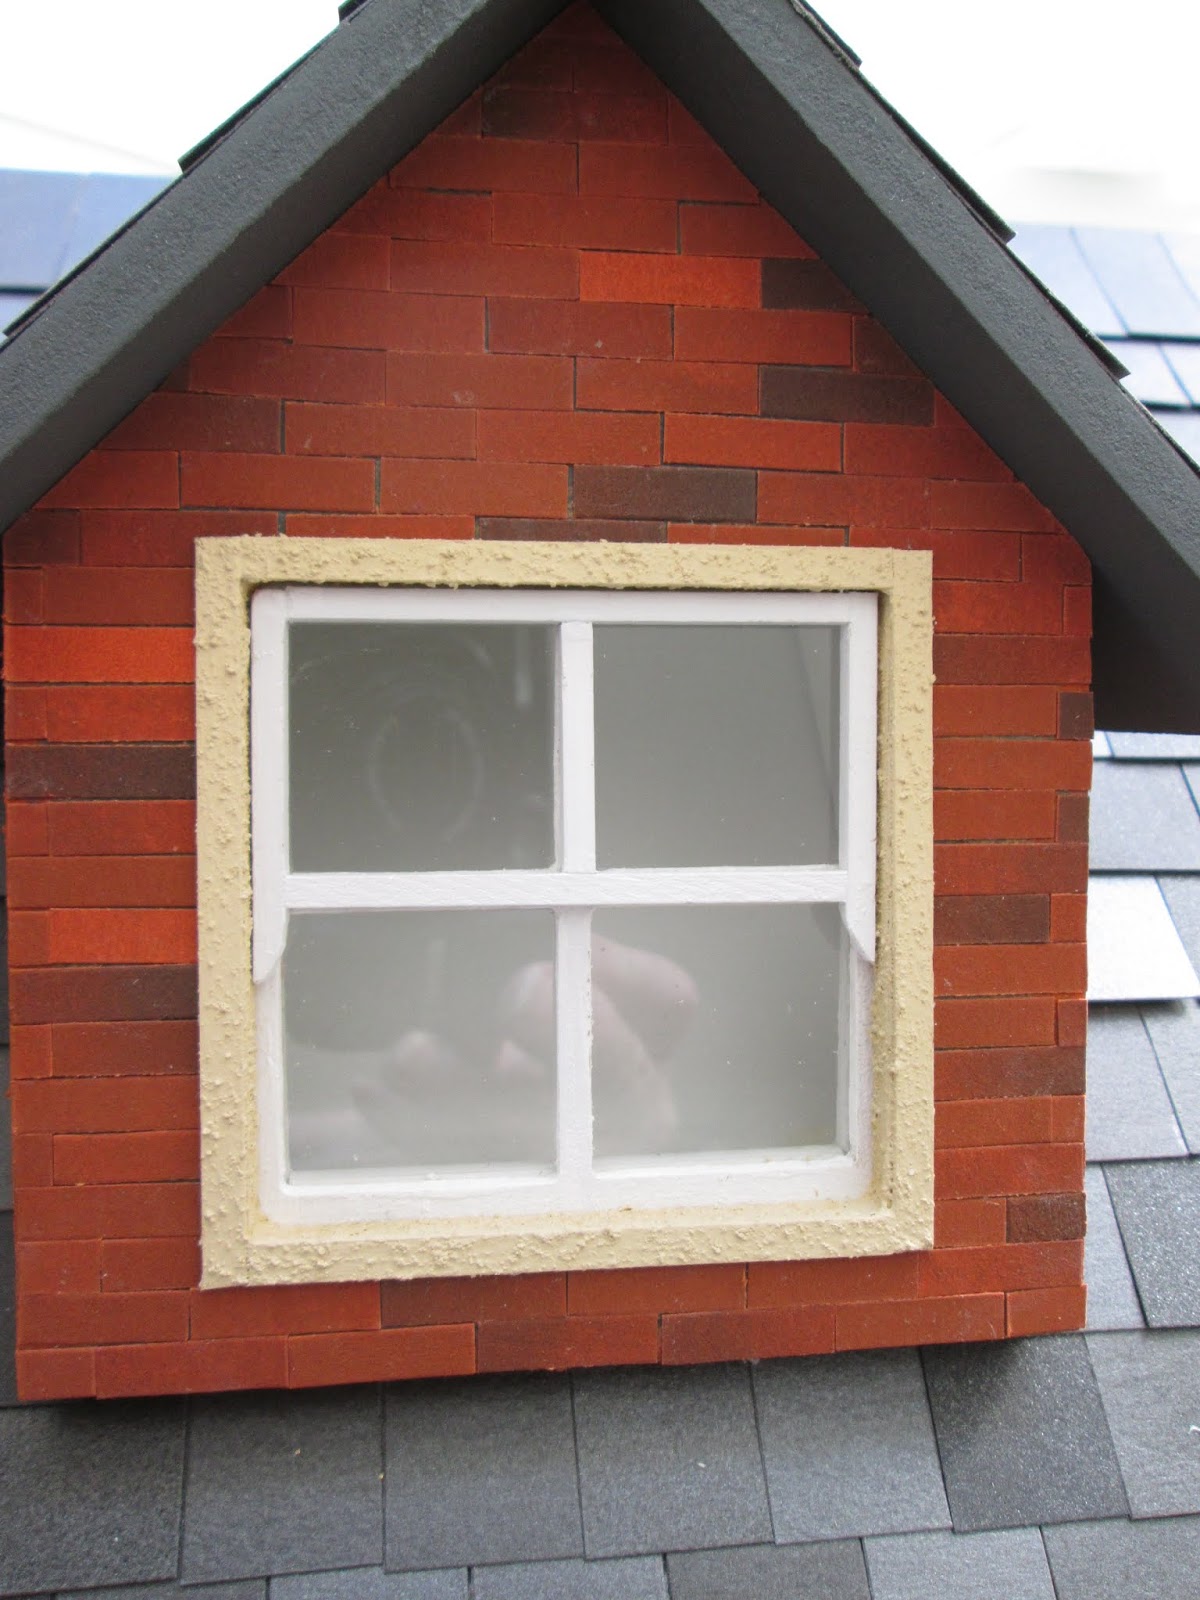
Dormer windows

I kind of sorted out the no-wallpaper problem, rather than just white paint the lot.  I quite literally had three small pieces of the green paper left over which got patched and joined together with a panel each side of the window and a piece beneath.  The hairiest part of that job was having such a large pattern which needed matching over very minimal pieces of paper, absolutely no room for error.  

I did this before Anna kindly offered to mail me a couple of sheets all the way from Australia.  [Thank you, Anna]  Not that she didn't comment and email me as soon as the post went up but the posts run close to what I am doing but I am often a little ahead of them in actual work. At least my having already fudged it saved me from  having to make another decision of how best to go about it.  I seem to be floundering a bit in that department right now.

As I didn't have any grey paper at all I did my best to mix a grey as close as I could get to the one in the room - it really needed a slight touch of blue but, as I keep saying, the inside of a roof flap really isn't an area which gets looked at.  It just needs to give a good impression of being finished.  I keep telling myself that.

The decorated sloping walls also have a small dado rail trim between the paint and the 'colour' as it might do in real life.


On to the windows

I prefer to cut all my trims with a saw and mitre block, even the thin ones.  My husband can go through them with a knife in a couple of passes - me?....  I find it nigh on impossible to use a knife through wood.

If you are cutting very thin trims like these you need to boost it up from the floor of the mitre block.  Generally you would add a piece of thick(ish) wood.  I didn't have any so a sacrificial eraser was used and it did just fine.


I use. 0.5mm clear acrylic for the windows and this can be cut with scissors but I find it seems to squidge all over the place between the blades so  I cut it with a very sharp, new blade, Xacto knife.  I also resort to overkill in terms of preparation.  Having once actually sliced a small piece off the end of my thumb I am super-wary of knives.

I make a template for the window (in this case I could use it to cut three windows this size).  I fasten this to my cutting mat with tacky wax (double sided sticky tape will do).  I lay the acrylic over the template and then I even tape that down with masking tape.  Both my hands are now free to focus entirely on holding a steel ruler in place and cutting along its edge.  I don't have to try and stop stuff slipping around at the same time.


This acrylic was a leftover from previous exploits and didn't have any protective film on it.  It was super-dirty and even a bit scratched.  I have better on order.  It is sensible to gently soap and water wash it before  you use it as any really gloppy finger marks or whatever can be a pain to remove once it has been transformed into a 1/12th Georgian window pane. 

This is terrific glue for putting in windows but doesn't come cheap.  That said it has lasted me through several builds.  It does dry clear so if you are a bit messy with glue it won'r ruin your glazing. It also gives you some working time to get things positioned correctly.  It is water based for easy clean up and does a great job of sticking acrylic to a painted surface.


I don't know about you but every time I come to a glue I haven't used in a while I have to go tunneling for the glue down a teeny little hole.  This is my weapon of choice and is just dropped in my handy-on-my-desk box.  It saves a lot of bodging with pins, needles, toothpicks, dental picks, fine tweezers and a gazillion other things I used before I 'invented' this.  It even comes with its own handle, what's not to like.  


So.....  a very small amount of glue round the edges of the 'glass' and press it into place. In this case, on the lower half of the back of the window frames.


all four sides eventually had glue


It was then just a case of adding trims to make the bottom (inside) half of a sash window.  there will be architrave trims round this when they arrive. plus roller blinds to tweak it up a little and conceal even more dubious finishes.


I may have thoroughly shot myself in the foot with my latest dopey idea to 'improve the basic build.  Painting 27 sticks, cutting 264 smaller pieces very accurately, cutting two pieces of glazing for every window rather than one and then assembling this lot to make 16 'mock' sash windows is most probably very pointless.  As you all know once you set off on one of these paths there is no going back.  

Clearly that wasn't challenging enough, so I decided authentic windows needed those little nubs on the frame to stop them thumping down or up.  These require spot on measuring and judicious carving and sanding of just the right amount of stick to shape them and...... hey.......  I only have 64 of these to make.

Here is the before and after photo of the outside.


before
after


before


after

Yes, I know it is not earth-shatteringly amazing but it feeds the soul of a slightly bonkers mini-enthusiast.

Friday, 8 February 2019

How I fit a ceiling light

This is a post which the 'pros' among you can skip.  I do hear from the occasional newbie so I know this blog gets read by people new to the hobby or struggling with something for the first time and, though it is a detailed record for me about my project, it is also hopefully a help now and then for someone else.

So..... here is a very detailed account of putting in a ceiling light in Dalton House. 

This was probably not the least frustrating job to choose as my way back into the game.

My first challenge was actually reaching the top floor of the house!  It stands on a very useful Ikea, Kallax set of drawers with large trolley wheels added.  I am five feet six inches tall and the top of the roof is six feet from the ground.  Out came the little step stool...... then a bigger one.


When I opened the roof I discovered that one of my little visitors over Christmas had sneaked a body into the room and given her a book to read


So, yes, rather stating the obvious, if you are going to work on a ceiling light you could do with an empty room.  To minimise clear up just put down a tissue or piece of kitchen roll to catch the sawdust.


Locate where you want the light to be and then work out how to transfer that position to the floor above where you will be drilling the hole.  I often make a template of the ceiling, mark the position of the light and move that to the floor above, making sure it is in the right position allowing for various wall and trim thicknesses.  It is not as hard as it sounds as long as you line up the front edge of your template with the front edge of the floor and then just visually check that the thickness of side walls are allowed for.

On this occasion the position wasn't absolutely critical, so some careful measuring across the ceiling and then transferring that up top sufficed.

I used to have a right angle drill, sort of like the one in the photo - maybe not as posh/chunky  - but I decided in the move here that it was something I wouldn't use again, so it got given away.  It is super-useful when working between floors in a dolls house.  Luckily on the top deck I have all the space in the world to use any kind of drill.


If you can't snag one of these sort of kits on eBay for a good price there are small hand drills which will work in a confined space.  I can only suggest you google 'small hand drill' and find something like this that works for you.

Put the wire next to a drill bit and choose one that looks a little larger than the thickness of the wire. 


At last here comes the light.  The fan doesn't turn really but I thought my apartment dweller might find her bedroom very hot up there in the roof so she would be glad of the (pretendy) fan in the summer months.  Most lights come with a little two pin plug attached.  


If you are going to use a connecting strip like this one you will have to remove (or cut off the plug) to allow you to thread the wire through the hole in the ceiling.  Eventually, of course, you then have to re-attach the plug.  To remove the plug you need to use pliers (not teeth and cursing) to pull out the brass pins and then you can pull the wires free.  To put it back together it is a matter of putting the copper wire back in the holes and pushing the pins back in.  It is technically easy but, I find it pretty frustrating to do, especially if you are doing a lot of them.

Dolls house lighting connector


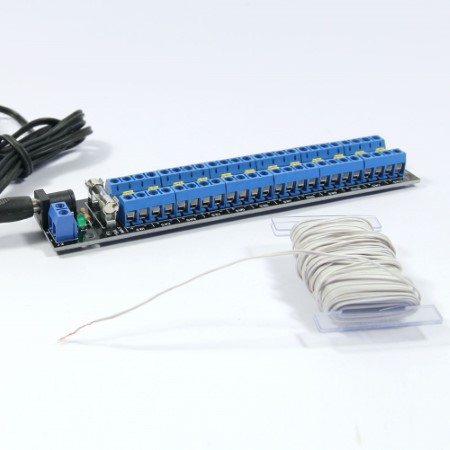
On my second project I decided to use this sort of connecting strip (photo below).  So much easier.  It is more compact and you can connect many more lights to the terminals.  It looks scary but I promise you it is much simpler.

I always bought mine from Small World Products.  They are now sold by:  Little House Plus

I will be writing a blog about gathering up all the wiring and attaching to the connecting strip and attaching the power supply when I get to do that but I am afraid that is probably a fair way off.  So if you are keen to get your lights attached to power before I do, the Little House Plus site can help you sort out how, or email me with any questions. 

Mix brick compound ready for application


Meanwhile back to this ceiling light installation.

Take time now to thoroughly straighten out the wire that has been bundled up for packaging.  Usually it will be lying in a groove in the floor above and needs to do that without any bumps and lumps under the future floor covering.  I lay it down carefully and cover with a strip of masking tape.  That stage is a bit further down the line but that's why you want the wire nice and flat and kink free.


If you have decided to cut your plug off you will need to expose the copper wires to test your light is working OK. Look carefully and you will see that the wire has a sort of groove down the centre.  Gently pull and you will see there are two lots of wire each coated in a plastic covering.  You may need to nip between the wires with something like nail scissors to get it started.


You then need to expose the copper wire.  If you are proposing to put in lots of lights (large project) or you know this won't be the only house you will ever do it is really wise to invest in this precision wire stripper.  It cuts the wires neatly and strips off the plastic covering without damaging the hair -like copper wires beneath.  Again, Little House Plus sells them for about nine pounds.

It saves on dental bills and split fingernails.


Tidy up the wires by bending the ends over a little and twisting them to make a good contact.


All this is so you can check that your light is working fine before putting it in.  Using a nine volt 'square' battery touch the wires to the plus and minus terminals.  It doesn't matter which wires go to which terminal.  A round battery will do - using the top and bottom but is more fiddly if you don't have three hands.

If a bulb doesn't light up it is worth trying to tighten it in its socket before flinging the light at the wall and hopping off out to buy another.  They are notorious for wiggling loose.  It may even be worth changing the bulb if that hasn't worked - assuming you have a spare.  After five projects and as seven years it has never happened to me, so clearly it is pretty rare.


Most lights you will buy have a spongy sticky pad where the wire comes though - I always remove these as I don't like the way it makes the light stand away from the ceiling or wall.  I then have a heck of a time gluing the light to the ceiling without making a mess with the glue.  I use superglue gel in very, very tiny amounts around the brass rim and then have to get the light in place very quickly before it 'goes off'.


On this occasion I was scuppered because the wire came through a hole in the side of the mount rather than (the usual) little nick between the mount and the sticky pad.  I was wary about having to remove the sticky tab and pulling the wire back through to the centre.  So, as the tab (luckily) was very thin I left it as it was and decided to use what I'd been given to stick the light in place.


When you drill down through the ceiling you almost always have a bit of scruffy wood that has been pressed out as the drill came though.  Don't worry about picking this off carefully to tidy up the hole and make the surrounding area flat.  The lights usually have fair size mounts on them which will cover up any mess.


The next step is one of personal choice.  You can twist the copper ends together neatly and tightly and push those upwards through the hole.  I find this nigh on impossible.  It is always hard to see where the hole is precisely and you won't have made a huge exit for the wire so there's not a lot of wiggle room.  I just sacrifice a bit more wire and trim back to where the wire is a single strip again.  This makes a nice rigid piece of wire to poke through the hole.

Remove the protective covering over the sticky pad or put super glue gel carefully on the edges of the mount - keep it to the inside edge so it doesn't squeeze out on to the ceiling.  There is an art to gluing tidily.  Practice makes perfect.  Whichever method you are using always make sure you put the wire exit hole or nick or any other flaw on the mount to the back of the room so you aren't staring it in the face when the light is in place.  You really only have one shot of sticking it in place well.  Gently pull on the wire, supporting the light at the same time, until the mount is where you want it and press it firmly in place.


I haven't cut a groove for this particular wire to lie in or a hole for it to exit through the back panel yet.  I am pretty sure I will be laying a cardboard painted cover over the wires on this level and may not need the grooves.  I will drill the back holes all at the same time when the three rooms are completed and I am ready to tidy up the wiring and attach the power supply.


Hey presto one light fitted and room furnished all ready for dressing.  The hangers, hair dryer and gel have found their way in and I have a bedding kit to make up along with a swivel mirror and other 'thoughts' to share with you next time.


For now, Nighty, night-shirts.

Saturday, 5 November 2016

Finishing the roof

Versi Slates from Staceys Miniature Masonry are even easier to do than the bricks.  They are larger so they cover an area faster.  They need very little fiddling around with to keep them on line and in regular rows.  It is a simple case of starting from the bottom and overlapping by half a slate on each row as you go up.

If you have dormers to get round it is best to make a template with a scrap of paper for any awkward shapes so you don't waste a lot of slates getting it right.  Cut some paper the same size as a slate, put in place and make creases with your nail in all the places that you will need to cut out.  Cut out and check the fit, then lay the template on the tile and cut out the finished shape to glue in place.


template

tile fitted around the dormer roof

I did the roof area fairly quickly and then bashed on with the dormers.  It would be easier if they could be done before gluing them to the roof, but the ones on this kit were a fiddle to get right and needed to lay on the roof as part of that process, so the dormer roof tiling had to be done from every which way with them in situ.


Calculating the number of tiles is never and exact science and it can be frustrating to have to order a few more to finish but equally annoying to have a ton left over.  This time, incredibly, I had exactly the right amount of basic tiles.  As the last one went in place I couldn't believe my luck.

topped with ridge tiles

At the end of the whole job I was left with zero amount of ordinary slates, five ridge tiles (upper left in the photo) and three one-and-a-half width slates (upper right).  


finished

Then came the always fiddly job of attaching the roof to the house.  This is never a part of the construction I  enjoy but has to be done.  I am afraid I can't offer any handy tips to make it easier.  It is just a case of marking up the screw holes carefully and pleading with lady luck..... oh and the ability to work from all sorts of silly angles, whilst standing on a step stool.


Initially I only attach the roof flap with a single screw in each bracket.  The other half of the bracket which attaches to the ceiling is fully fixed.  I know I will need to remove the roof  flap when I come to work on that area as it will need decorating and blinds added.  The hinge screws are very short and they don't take kindly to be putting in and out, so best to leave out what you can until the final fix.

just one screw in place

So here she is - warts and all - god bless her and all who live in her...........


Dalton House

(25/04/16)


Saturday, 9 July 2016

Roof tiles


Like the brickwork on the house I am using the same material for the roof tiles.  These are versi roof slates from Staceys Miniature Masonry.   They are easier and quicker to do than the bricks.  A handy tip - buy a couple of packets of their one-and-a-half width slates, especially if you have dormers to go around.  If the gap you need to fill at the edge of your roof or beside a dormer is less than half the width of a slate it is better to use an over-wide slate and cut that to fit.  Little slivers of tile are visually distracting and wouldn't be at all practical to fit in real life.


tools you need, plus scissors

I start at the centre of the bottom edge of the roof and work away from there to the right and to the left until the first row is in place.  Ignore the lines you see drawn here - they are a mistake (I forgot for a moment how I go about this!)  You'll need some glue (usual tacky PVA is fine).  I put this on the tile with a toothpick or, in this case, teeny tiny brush thing.  A ruler, sharp pencil and scissors are needed now and then.

my checking tile

The tiles will overlap by half .  To keep a constant check on horizontals and verticals I cut a tile in half and draw a line down its centre.  Makes sense to do this on the side you didn't choose for your roof. (The tiles have a silvery finish one side and a black finish on the other). 

keep checking

Every now and then I check that my tiles are staying on course by putting my checking tile at the bottom of the tiles which are already glued in and with the pencil line over the gap between two tiles.  Then I set the new tile new tile exactly above it.  It is now precisely overlapping by half a tile and is centered correctly. 

guidelines

When I have a couple of tiles in place - well spaced apart - I rule a line across the top of them to give me a guideline for the rest of the tiles. This makes each row accurate and very quick to do.

Any questions just ask.

I am sorry I can't show you the finished roof just yet.  I didn't follow my own advice and I forgot to order extra wide tiles so the roof tiling is on hold until I have been to Miniatura and picked some up.  

The pros amongst you will wonder what the heck I mean as Miniatura will have happened in April and you are reading this in July!!  

I am actually writing this post on the eleventh of  March and already have several posts scheduled to keep me going until July.  It seems the obvious way to go about this game. If I write in real time you will be overloaded with stuff when I have time for my hobby and things are bowling along and then you'll not have anything to read for weeks while I am doing a ton of painting or sticking on bricks.  I write something each time I do the next step and add it to the others in the queue so you get a weekly bulletin.

This is why my YouTube videos are out of sync with the blog.