Showing posts with label Fireplaces. Show all posts

Saturday, 8 July 2017

Fireplace goes in

This should be a pretty straightforward visual of the fireplace and chimney breast going in place.

I used double side sticky tape on the bottom of the chimney breast.  The thinking being that glue would make a mess if it dragged on the floor. Ideally it wouldn't touch the floor as there was enough wriggle room to get it in without doing that.


My usual De Luxe model glue on the back of the chimney breast and fire box.  I find it sticks to paint better than wood glue does and the wall it was going to was painted.


 Remembe the previously drilled holes and the cocktail stick marker, that was I was working with to get the 'unit' in exactly the right place.  It was  all a bit fiddly locating the hole in the fire back without shoving glue hither and yon.  Success though and the chimney breast shoved nicely on to the back walls, no gaps, no funny angles.  I do like this MDF kit.


The marble hearth in front of the fire measured six inches the chimney breast measured five so I used an easy guide of a six inch ruler to glue the hearth down at the half inch mark.


Everything nicely centered and the grate and coals could go in.  This isn't glued in.... just in case?


The mantel went in in place just by eye as there was very little room for error


I now have a room just waiting for all its wood trims.  Not especially looking forward to a couple of days painting trims but needs must .......


Major learn from this .....  no need to get fancy schmantzy and drill the hole for the fire wire at an early stage and then spend ages fiddling a 'unit' into place.  Skip that move and just measure and mark where your chimney breast will go (on the wall or floor using masking tape)  and glue it in and, then drill the hole for the fire wire through the fire-back and back wall.  Obvious really.

Saturday, 17 June 2017

Chimney breast - almost

Curses, curses, one very cross mini person!

As I have arrived at the last fire to go in this house, I decided I would record in minute detail the processes involved in getting a chimney breast into the house.  So every little step of the way was photographed.  In a way this makes for a frustrating bit of work as you have to stop and do this, rather than just get on.

Eventually both jobs were done and content I had a zillion photos I put them in my computer to edit and discovered I had a scattering of photos taken throughout the process totalling six!  I have no explanation for it and spent the following day pithering around with camera and computer and could not replicate the problem.

So, verbally, this is how it went..... with the occasional not too useful photo.

I had a chimney breast kit purchased at a show for five pounds a while ago.  I forgot to note the vendors name. It is a good piece of kit, sturdy and had routed edges for the two sides to glue into which made a neat join and easy to keep square.  So I began by gluing the three pieces together to make the wooden chimney breast.  Make a note here - before you do that make sure you have checked the height of your room and the height of the chimney breast - no reason it should fit as it is made for a heap of people.  Guess who never thought about that at all and then later had to get husband, with chop saw, to lob off the excess.

I then made a cardboard hearth.  To do this I used the thick grey card I mentioned a while ago (ticket board?).  I stood the chimney breast on the card and drew around it so I could cut a piece that would fit inside the chimney breast but come to the front edge of it.  If you look at the second (front view) picture here you can see its shape.   This is to sit under the place where your fire will go. I needed the grey colour of the cardboard for this project so it was just a case of putting some spots of pencil all over it (like the marble I will be using for the hearth at the front of the fire, and then a gloss varnish.  I didn't want them to match but I did want them to blend into each other.

Then I made what would be the brick back behind the fire by scoring the same thick card and folding into a sort of screen shape, 


back of hearth brick walls


This was then covered in brick paper.  If you are making a 'real' wood or coal fire in your project, you would need to dirty this up with some paint, but my fires are in a modern house and are all, in fact, gas!! This piece was then stuck to the hearthstone.  You need to measure and mark carefully from each end to ensure the angle of the fold turns out the same.

front of hearth

At this point you can put this in place on the back wall of the house and drill a hole through the piece and through the back wall of the house, so they will line up perfectly, for the wires of the fire to go through.  I even pushed a cocktail stick through the hole to make sure I could locate it easily and that there was a decent size hole to fiddle wires through. What I didn't do however, is actually do it at this point.  Looking at my photos it appears I did the hole drilling manoeuvre using a piece of spare card and just the fire back.  Same difference though.


hole drilled and cocktail stick through back wall and brick facade
left the cocktail stick in place after removing the hearth
The brick hearth section was then glued into the chimney breast

back view of completed hearth and chimney breast


 I painted the front grey with a thin grey/black edge for inside the edge of the mantel.


front view, painted

We now have a fireplace and chimney breast which fits snugly to the back wall and has a smooth front edge waiting for the marble hearth to be butted up to it.  Now, for some choices.

It can be glued into your house on to the unfinished floor (and back wall) and any flooring can be cut to fit around it; this is probably the best way to go if you are wallpapering as you really need to get on with that before the finished floor goes down to ensure you have neat joins in the wallpaper and you probably don't want to be sloshing wallpaper and paste around a finished floor.  As I am painting this room I think I can do the three coats of paint on the walls and the chimney breast separately and they will look fine when the chimney breast goes in place. (?)

I have to have all the walls in a finished state so I can put in the wall lights - remember that saga? - and run the wires across the floor, then the floors can go down.  So, the order for me for this room is:

1.  paint walls
2.  put walls lights in
3.  floor can go down
4.  chimney breast in place and fire and mantel and hearth installed

Finally here is a mock up of what the finished article will look like when it makes it to the room itself.  The walls definitely look pale grey not blue like they do in these photos.


Hopefully lights going in will be my post next week.


-------------------------------------------------------------------------------------------------------------------------------------------------

I quite like my bargain pair of tables for the hall.  They were intended for the Dining Room but are far too 'busy' to go in there.  I am still not too sure if they aren't a bit too 'barge-ware'.
They only cost £3.90 each from Maple Street  so were worth a punt for a lick of paint and some decoupage.  I searched the web for 18th century inlaid table images, found something I thought I might like, copied it to word, shrank it to fit, cut out bits of the pattern and glued it in place.  I did give it a coat of matt Mod Podge afterwards to sort of smooth it over and they look just fine.  They wouldn't bear close inspection.  I am also a great believer in 'these will do for now' and when I see something better they can be switched out without a lot of guilt about money wasted.

Maybe they are a bit 'clunky'

It was really just a matter of removing the frame around the pattern and separating the elements

The hall is plain enough to take them????
-------------------------------------------------------------------------------------------------------------------------------------

There will be two posts this weekend as I want to catch up on the York Show post from last week which I didn't do.  So the photos of purchases will appear here in this blog tomorrow and the show 'review' will be in my Dolls House Trips and Shows Blog


(31/5/17)

Saturday, 11 February 2017

Chimney and fire finished and in place


Here's a reminder of what real chimney breasts and fireboxes look like.  We don't need to construct the flue because we will never see it but the rest of this diagram gives you a good idea of how the rest fits together.


Paint inside the firebox and the back wall where the fire will be.  This can be finished in any way you like - add bricks and dirty them up for a real fire, or paint in any colour or finish for a modern gas fire.  My fires are supposed to be gas fires not coal fires but I opted for a simple dark grey (my slate undercoat) paint.


inside the firebox


Cut out the wallpaper to fit the shape of the chimney breast.  Paste the chimney breast with wallpaper paste of choice - for me its this border adhesive right now and I use my fingers for the spreader.  You could paste the paper instead, but this way round is probably easier.


paste wall rather than paper

Some papers (just like real life) will tend to bubble.  Don't panic; just gently dab the surface all over with soft cloth.  Don't rub and don't over do it, papers can be frail when wet.  Be sure they are air bubbles and not clumps of paste (or debris!).  If the bubbles are now small like these they will disappear when the paper is dry and shrinks back to proper size.


scary bubbles

I decided on a marble slab trim.  I had some left over from when I trimmed the fireplace ages ago.  I got it by typing 'marbled paper images' in a Google search - found what I wanted, copied and printed it.  You'll see a yellow version on the fireplace in the music room when I come to work on that level.  Marbled paper gives a smaller pattern to go at than  sample pictures of life-size marble.


first 'slab' in place


I folded the edges over so they look like marble slabs just in case anyone decides to look around the fireplace edges with an endoscope any time - just one of the daft things we do - no-one will ever see this again!  I coated them with a layer of Mod Podge just to take the fuzz off the paper surface.  Mod Podge is sold for decoupage so is ideal.  It doesn't run the inks and is very see through.  Mine is mat so doesn't catch the light but 'hardens' the look of the 'marble'.


folded over to give illusion of depth

I digress a little here to show you one of my HUGE favourite things.  Our B & Q has a little rack of Rustoleum's Painters touch specialist paints at the end of one of their paint rows.  There are tiny pots of all sorts of things - my favourites being their metal finishes and their chalk paint.  This one is the Pewter finish.  It is water based (easy clean up) goes on thinly so doesn't cover details, dries quickly and leaves no brush marks.  It's the bee's knees.


big favourite
This is a Phoenix fireplace - they are made in a sort of pewter but they look much better when painted with the pewter paint!
painted


So here we are fireplace lit and in place - tick!  Not very brightly lit as I am using a 9v. battery just to check its OK.


Ta-dah

In summary I confess that if my budget stretched to it I would prefer to get someone to cut my chimney breasts to order.  There is no 'worry' about wood bending in any way and it is robust enough to shove in and out if necessary when you are wriggling the various components in place.  I think Jennifers of Walsall can offer this bespoke service.  

Dolls House Cottage Workshop do some pre-cut ones.  I used one in the sitting room and it proved easy peasy.


(26/08/16)

Saturday, 4 February 2017

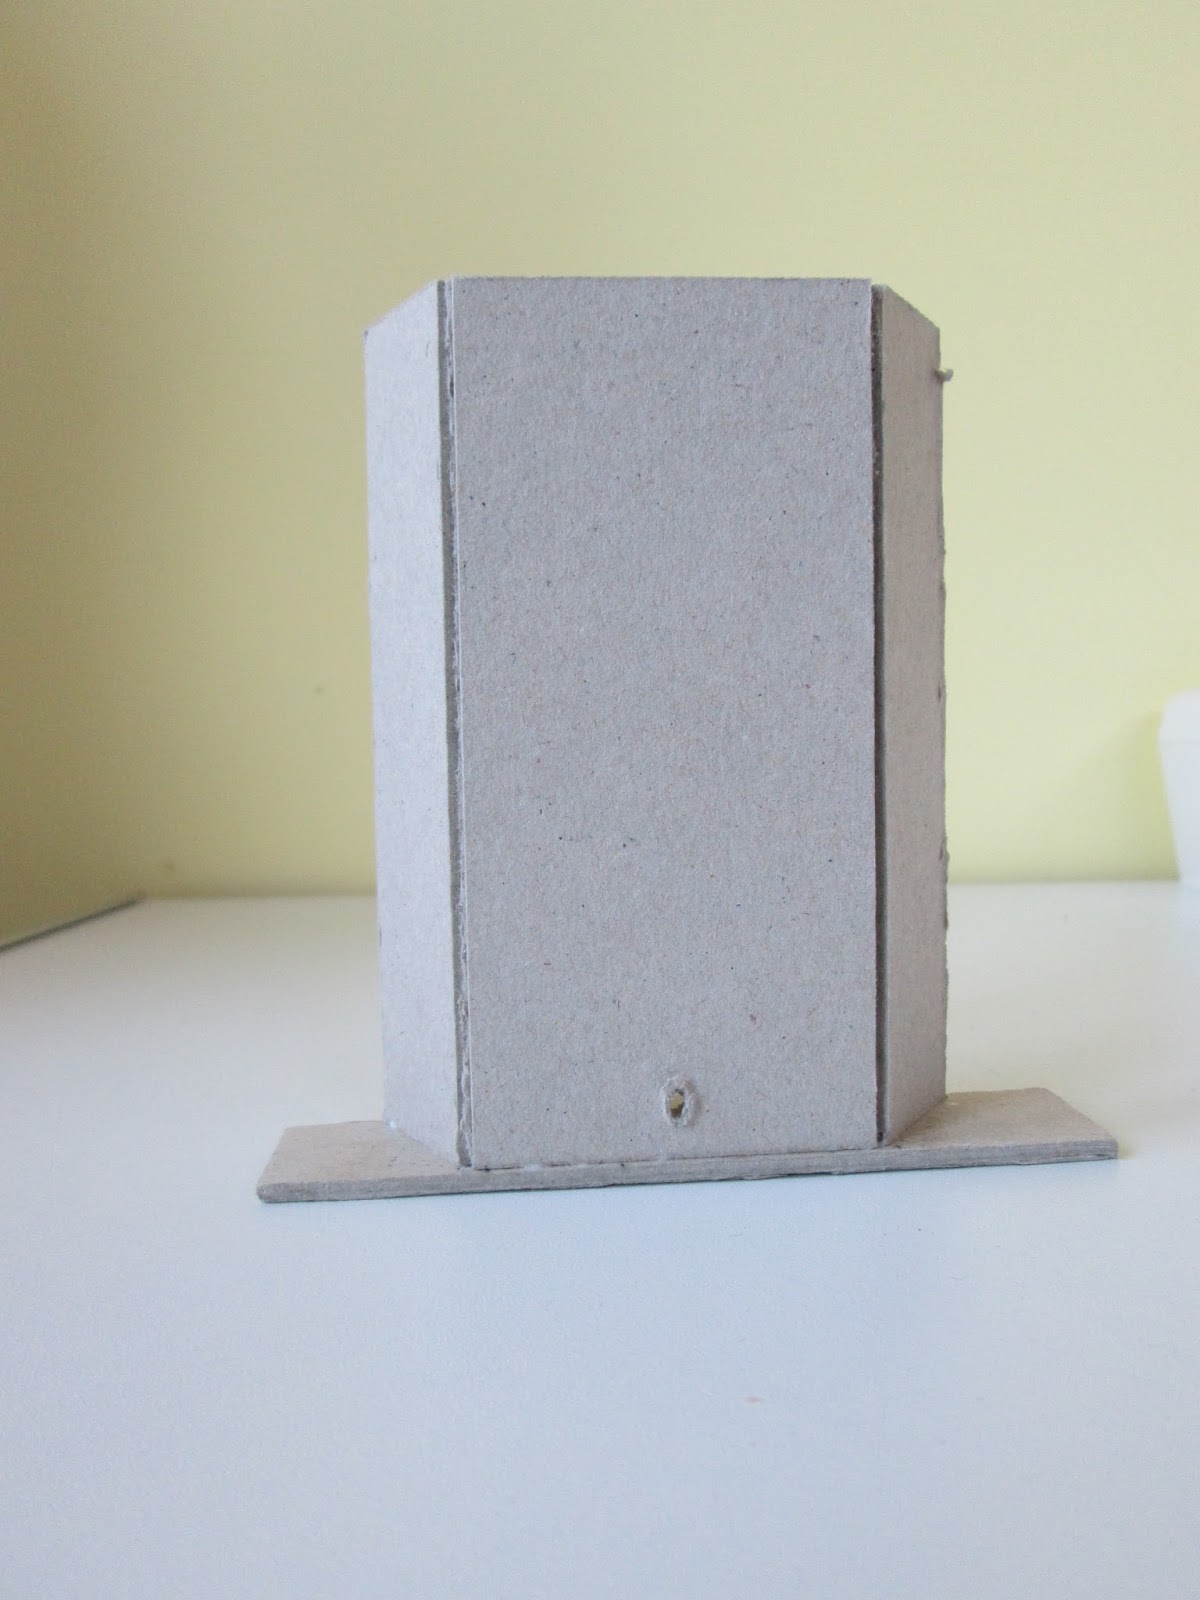
Carboard chimney breast

It has been weeks since I touched the project - this happens to me sometimes.  I don't actually go off it I just seem to reach an impasse and find myself making all kinds of excuses for not moving forward.  This time it was how to deal with the back wall of the dining room.  I had an idea I wanted something like this but without the jib door.


It is a pretty easy construction to copy so I fiddled around with cardboard to see what I would need to get the cupboard cut for me or to buy and fiddle a ready-made into place.  Ultimately I decided I didn't like how much space it ate up.  You need a minimum of 1.5 inches from the back wall to the front face of the chimney breast, plus the one inch of hearth and fire surround in front of that so, in effect you lose 2.5 inches from the depth of the room.  My rooms are 15 inches deep so it seemed like they could sustain that - but - add in a large dining table and chairs and we are now decidedly squeezing past the chairs if we want to move around the room.  The other issue was the chimney breast needs to be 5 inches wide so the cupboards either side would need to be less than 3 inches wide if I wanted even a smidgen of wall around them.  Basically this idea was kyboshed and I went back to the notion of a simple chimney breast taking up 1 inch depth, plus the hearth and then furnishing the alcoves either side with something....??????? to display dishes and silver.

It did do me a huge favour though as I have ended up with what I hope will be a usable chimney breast made from cardboard.

front view

I was wondering about the stability of cardboard but two things convince me it should be OK.  Firstly I follow three wonderful miniaturists who build almost entirely with card-stock and mount board and there isn't a hint of any future problems with their work.  Secondly if I think about it just about every inch of my project is damp vulnerable from the MDF used in the house construction to the cardboard tiling and bricks and all sorts of paper products inside the house.  I have no intention of putting my house anywhere where it could be damp so I don't think there will be an issue with any of it, chimney breast included.

A mini friend gave me some foamboard (she does terrific stuff with it) but I haven't done all that well with it.  I can't seem to cut it with a decent ninety degree cut and I do seem to ravel up the foamy insides between the sheets.  I will persevere now and then when it seems useful but for a wall that I wanted to stand up straight, heavy cardboard seems to be the way.

I bought a large (22" x 32") sheet of stiff grey card - is it called ticketboard? - for £2.15 from Hobbycraft - in their mountboard section (mountboard is more than twice the price). Probably 1/16th inch thick and quite rigid. It cuts OK with a Stanley knife/box cutter as long as you remember the golden rule of making lots of small cuts and not trying to get through it with one or two slices.

I measured the fire surround mantelpiece; it was 4.75 inches wide. I didn't want the chimney breast to be much wider, so I added a smidgen to that making a five inch width piece of card.  The room is ten inches high but I don't want to be struggling with a tight fit between floor and ceiling so this time I knocked off an eight of an inch.  The ensuing gap with be covered with coving.  I made sure that any edges that would be standing on the floor were the already manufactured straight edges so that I would get a nice even base for the piece.  

I then lay the fire surround and fire on the chimney breast front that I'd made and worked out how large I wanted the fire box opening to be.  Measure, draw and cut out.  After that everything else was pretty much one inch strips of card.


gubbings behind

The exception being the piece that goes under the fire so that it stands level with the hearth.  This needed to be one inch deep plus the 1/16th thickness of the card so it could be shoved forward inside the front edge.


not a pretty sight

I used some off-cuts of wide coving just to ensure the sides were glued on at a neat 90 degree angle to the front.  At some point I realised they would be even more useful glued into place to do that job and would give the chimney breast some weight and substance.


Whilst making this I have also become a convert to Mod Podge. (made by Plaid)  Best to google it as there are so many variations.  I have just used the bog standard Mod Podge Mat finish and it glued great and sealed any hairline gaps really well and coated the edges of the cardboard and then it went on to be sanded down brilliantly.  Lovely medium for putting (cheap fuzzy) cardboard together but wanting a wood finish to take paper and paint properly.

People claim it is watered down PVA but I am not convinced.  PVA - the normal white craft glue - goes some way towards what this can do but I'd claim this did what I wanted much better than PVA would and for the small difference in price you may as well get the real McCoy.

Come back next week for the finished article.


(24.08.16)


Saturday, 3 December 2016

Making Fireplace (rewind)

A couple of posts ago I showed you what I was doing to make the fireplace for the sitting room.  At some stage I realised it was overkill and it wouldn't work as well as the simple solution so.... here is how I actually ended up putting this fireplace in place.

Here are the components...


This is a piece of skirting board cut to shape and painted, with the carved side down, to go under the grate to fill in any gap and to raise it to the level of the hearth.


The finished wooden chimney breast assembled and the joints sanded to make it absolutely smooth.


The grate cleaned, lightly buffed and then painted with pewter paint.

A piece of mount-board cut and painted to fill any gaps between the fire grate and the surround.


hole in the back wall for the wires to exit and grey paint for any wall that might show

I drilled a hole in the back wall for the wires to go through and painted the area of the back wall which shows slightly above the grate.


Here is the order of assembly......


The hearth under the grate is glued to the chimney breast.  Check it is flat to the floor.


The gap filler is stuck in place.  Try and get it well centered.


The fireplace is glued in.  I used super glue gel and even clamped it to make sure it lay flat all round.


ready for the vertical

The assembled fire is laid down and the wires are threaded through the wall.  I then used a brush to apply wood glue all round the side and bottom edges that needed sticking in place.


Ta dah!  One fireplace in and two more to go.


(19/05/16) 


Saturday, 26 November 2016

Painting a pewter fire grate pewter!


The first fire grate I am using is a register grate.  Most people (including me) would call it a hob grate as it has two hobs either side of the fire, but it also has a back plate - the register - to protect the chimney wall and direct the heat.  These were the first fitted fires!

The hob grates were used right through the house in varying sizes and for different purposes the largest could be used for cooking; the smallest in a bedroom or other small room might just be useful for heating water or curling irons or anything else that we now just plug into a socket to heat up.

A nice middling size such as this would be sold as a parlour grate and it was quite common to keep a small kettle on one of the hobs to make your guests tea and to 'top up' the pot or maybe keep the hot chocolate warm.

Mine is going in Dalton's parlour - though I confess I see it as a modern gas fire copy of the original Georgian which may have been in there.  I don't want poor Eileen to have to haul coals all round the house to light the fires in 2016 so we'll just settle for replicas.  It saves on companion sets, fenders, coal hods and coal.  More the search for suitable ones rather than the cost.

The photo below was the inspiration piece for the finish on all my fires - I didn't want black cast iron as you lose so much detail and I didn't want stainless steel as it is too bright - I like this pewter look.


The fire kits from Phoenix are made in pewter (?).  If you look at the unfinished piece of kit on the left of this photo you can see it is a pale, 'rough', sort of finish.  I bought some fabulous paint from a range of tiny pots called 'Painters Touch' in B & Q and gave the grate a couple of thin coats.  It evens up the surface colour and gives a slight sheen and highlights the patterns in the metal - all round I am very pleased.  

If you go to B & Q, seek out this stand of specialist paints they have some great stuff, metals, chalk paint all kinds of things and in tiny pots you can afford.

Incidentally these metal kits should be glued together using a two part epoxy.  I have done that with previous kits but, this time, I just used a gel superglue and it seems fine.  It isn't something that will be mauled around so I am expecting it to stay together without problems.


Click on the photo to get a screen size version for a better look.


(16/05/16)

Saturday, 19 November 2016

Making chimney breasts and fireplaces

I have been fiddling around with making a chimney breast and fireplace for the dining room.  The current notion is to do all of these through the house before coming back to cracking on with the ground floor rooms.  I am driving myself nuts with 'do I want the fireplace at the back or side of the house?'  Legitimately in a Georgian house they could pretty much go where they like - they have chimney stacks all over the place on fair size houses BUT with the more usual terrace, such as this one, they are decidedly on the side walls - the stacks being 'shared' between the adjacent houses.  Last time I was in Edinburgh I saw some stacks with as many as twenty!!! pots on them.

So I am being a 'good girl' and sticking with that notion although that means more of a challenge with the wiring, less visually attractive furniture placing - ending up with the back of a sofa facing the viewer for example and no real sight of the fireplace after all that bother.........   just while I was typing that I switched back to having them at the back of the room facing the viewer - after all this is a dolls house not an architectural model!  

So, I have no idea where they will end up........but here is the start of the process.


The chimney breast is a kit from Dolls House Cottage Workshop.  Chris W does several sizes of chimney breasts and his site is really worth a tour for all sorts of reasons.  His trims are the very best I have found.  Beware you may end up buying a new project!!

Start by gluing the three front pieces together.  Lovely quality wood, perfect cutting and no warping; unlike the home made one I made on a previous project.


Then the back pieces go on.  if you have something with a good 90 degree side it does help get them spot on.  My corner block is a small one so I ran it up and down the side edges a couple of times to check the verticals and that the wood was edge to edge.


Before the glue sets up completely it is a good idea to see that it will stand unsupported - again, unlike the home made one which wanted to fall on its face every time it was released.

At some stage when it is bone, bone dry (days later) give the joints a fine sanding to make them silky smooth or wallpapering.


I totally love the things that Phoenix Model Developments make and have always used their fires where I could.  This time the whole house will only have their fire grates in it.

There is one small caveat and only because I am so fussy.....  if you are putting in the lighted coals you need to consider the relationship between the wire and the grate.  Do a sort of dry build and look at the diagram and figure out where you want the wire to appear and then exit from the fireplace.  In this particular model I didn't want the white wires to be coming down the front of the back plate of the fire - hope that makes sense.  It is very easy to drill a hole (it is very soft metal) with just a little hand drill and the wire can go where you want it to.  Also, as the metal is very soft you can always finesses the fit of the parts with a little squeeze if needed.  It rarely is.


The grate with the wire coming out of the back rather than dropping down and being visible at the front.


I have probably chosen the wrong fire to do this demo with as it has its own surround which covers the usual visible brick fire box that grates go in.  Here's a diagram of the usual construction:


Even though it wasn't really needed it seemed right to still build a firebox for behind the fire and to fill any tiny gaps between the fire and the surround.


A very kind mini chum sent me some foam-board (thank you) to have a go at making walls and cupboards and such like.  I thought this box would be a good stepping off point as it wouldn't be seen.  I marked up the opening I would need, gathered a scalpel and steel ruler and away I went.  I remembered the tip to cut it in three or more strikes of the knife, let the knife do the work, don't apply pressure and try the cut a nice squared off edge.  I did OK for my first go at the promising future relationship of foam-board and I.


All glued together and right angle joins not bad, measuring lengths not so good!!


Painted black in hopes it would 'disappear' it if it showed any where.  also made a corresponding hole for the wires.


Test fit the front.  Seems OK.


As I said, this is a bit of an odd one as the firebox is now invisible behind the finishing plate around the grate.


Ultimately the chimney breast and fire box and grate will be fixed in the room and the wallpapering done before the fire surround goes in place.  Much easier to paper first than to fiddle around a fireplace.

I have ordered a hearth made of Decrastone - a mix of stone and resin - from Dollhouse Flooring .  I should be with me - cut to size and polished - when I get back from a few days away, so that should be my next post.

(09/05/16)