Sunday 27 November 2016

Purchases from York Show

I haven't really done a review of the York Show over in my Show Blog as I pretty much said all I could say about it when I wrote about the Spring Show.  I had a nice couple of days away in York but didn't really do very well at the show.  How you interact with a show is very subjective and very dependent on mood I think; sometimes I come away with hoards of good stuff and then, like this one, wonder why I am trawling round.  I am sure the eighty-one vendors had much more to offer.  Here are the sixteen things I bought:

chimney breast kit

I bought this chimney breast kit for two reasons (1) it only cost £5 and (2) it has grooves at the back so you can easily inset the other pieces and keep them nice and vertical.

grooves in the back for side pieces

I am pretty sure I don't need it for this build but I am also pretty sure this probably isn't the last project I'll do (like it is supposed to be).  I wish, I wish, I wish I knew who I bought if from - not much use to me when I need another four!!  All I can do is keep my eyes open in hopes of spotting it again at a fair.  Can't even visualise the stand let alone name it.

leather coat  and scarf/shawl/wrap/whatever

I liked this aviator type leather jacket and scarf for the mud room hooks.  have prised the coat off its hook and rehung it on mine.  Not as easy as it sounded.

for Rec room
Joanne's (95p) shoes to be kicked off in the Rec room like her brothers but only cost pennies.  I got a rack of CDs/DVDs/games - whatever it is that kids have nowadays.  These are Delph's but from another vendor.  The pig has a bit of a story.  I want as many things in this house to have some nudge to my real life with my kids.  I had a large piggy bank for many years - white with daisies painted on  it - always known as Daisy Grunter, so this is an homage to her.
looking for feet

Last month I bought a pair of expensive lamps from Miniatura and one was missing four tiny feet under the bottom plate.  It was sold to me with the instruction to contact the artisan and she would happily send me the feet.  I have emailed her and the vendor to no avail - no response from either!!  Bit peeved I must admit.  I am now on a hunt for gold no hole beads but am reluctant to pay postage on a very low price purchase.  Tee-Pee had no gold no-holes and I didn't find anyone else with any, so bought silver and will paint them.  Also bought some little 'cups' shaped findings in hopes but they are way too big.

mad cat

I once had a lovely cat but sold it with my twelfths and have never seen one as nice since.  As this was all of about a pound I thought it would do for now.  I am a great believer in stand-ins.  I much prefer them to gaps.  I think if I de-pink its inner ears it might even do.


Add caption
Thought the glass cleaner was well made and every cat needs a dish or, in my case, two dishes as I found I already had one!  This discovery gave me a brainwave though - I need to photograph the contents of my house dressing boxes and carry them with me in my 'bragging book' so I don't duplicate stuff.  Visuals are much quicker than an extremely long list.  This show I nearly bought a toaster for example for the loft flat which is not a cheap purchase; luckily I didn't as I spotted I had one of those as well when I got home
tulips and finding

Again the tulips will act as stand-ins until something better comes along.  The silver bowl is a real find in Tee pee's findings.  Nicely engraved outside with a band of flowers and patterned inside too - will look nice when it is filled with fruit or something.

cheap books
These are real shelf-fillers - six books for £1.20 (with pages!) and three other books for £1, scissors 50p for the Rec room cutting out table.

Huge apologies for not noting where I got anything.  I know it is absolutely no help to you if you want any of these things.  All I can say is that nothing is exceptional and if you go to any fair or do a google search you will find these, or similar items, very easily.

I had a strange time at this fair - very unfocused.


Saturday 26 November 2016

Painting a pewter fire grate pewter!


The first fire grate I am using is a register grate.  Most people (including me) would call it a hob grate as it has two hobs either side of the fire, but it also has a back plate - the register - to protect the chimney wall and direct the heat.  These were the first fitted fires!

The hob grates were used right through the house in varying sizes and for different purposes the largest could be used for cooking; the smallest in a bedroom or other small room might just be useful for heating water or curling irons or anything else that we now just plug into a socket to heat up.

A nice middling size such as this would be sold as a parlour grate and it was quite common to keep a small kettle on one of the hobs to make your guests tea and to 'top up' the pot or maybe keep the hot chocolate warm.

Mine is going in Dalton's parlour - though I confess I see it as a modern gas fire copy of the original Georgian which may have been in there.  I don't want poor Eileen to have to haul coals all round the house to light the fires in 2016 so we'll just settle for replicas.  It saves on companion sets, fenders, coal hods and coal.  More the search for suitable ones rather than the cost.

The photo below was the inspiration piece for the finish on all my fires - I didn't want black cast iron as you lose so much detail and I didn't want stainless steel as it is too bright - I like this pewter look.


The fire kits from Phoenix are made in pewter (?).  If you look at the unfinished piece of kit on the left of this photo you can see it is a pale, 'rough', sort of finish.  I bought some fabulous paint from a range of tiny pots called 'Painters Touch' in B & Q and gave the grate a couple of thin coats.  It evens up the surface colour and gives a slight sheen and highlights the patterns in the metal - all round I am very pleased.  

If you go to B & Q, seek out this stand of specialist paints they have some great stuff, metals, chalk paint all kinds of things and in tiny pots you can afford.

Incidentally these metal kits should be glued together using a two part epoxy.  I have done that with previous kits but, this time, I just used a gel superglue and it seems fine.  It isn't something that will be mauled around so I am expecting it to stay together without problems.


Click on the photo to get a screen size version for a better look.


(16/05/16)

Saturday 19 November 2016

Making chimney breasts and fireplaces

I have been fiddling around with making a chimney breast and fireplace for the dining room.  The current notion is to do all of these through the house before coming back to cracking on with the ground floor rooms.  I am driving myself nuts with 'do I want the fireplace at the back or side of the house?'  Legitimately in a Georgian house they could pretty much go where they like - they have chimney stacks all over the place on fair size houses BUT with the more usual terrace, such as this one, they are decidedly on the side walls - the stacks being 'shared' between the adjacent houses.  Last time I was in Edinburgh I saw some stacks with as many as twenty!!! pots on them.

So I am being a 'good girl' and sticking with that notion although that means more of a challenge with the wiring, less visually attractive furniture placing - ending up with the back of a sofa facing the viewer for example and no real sight of the fireplace after all that bother.........   just while I was typing that I switched back to having them at the back of the room facing the viewer - after all this is a dolls house not an architectural model!  

So, I have no idea where they will end up........but here is the start of the process.


The chimney breast is a kit from Dolls House Cottage Workshop.  Chris W does several sizes of chimney breasts and his site is really worth a tour for all sorts of reasons.  His trims are the very best I have found.  Beware you may end up buying a new project!!

Start by gluing the three front pieces together.  Lovely quality wood, perfect cutting and no warping; unlike the home made one I made on a previous project.


Then the back pieces go on.  if you have something with a good 90 degree side it does help get them spot on.  My corner block is a small one so I ran it up and down the side edges a couple of times to check the verticals and that the wood was edge to edge.


Before the glue sets up completely it is a good idea to see that it will stand unsupported - again, unlike the home made one which wanted to fall on its face every time it was released.

At some stage when it is bone, bone dry (days later) give the joints a fine sanding to make them silky smooth or wallpapering.


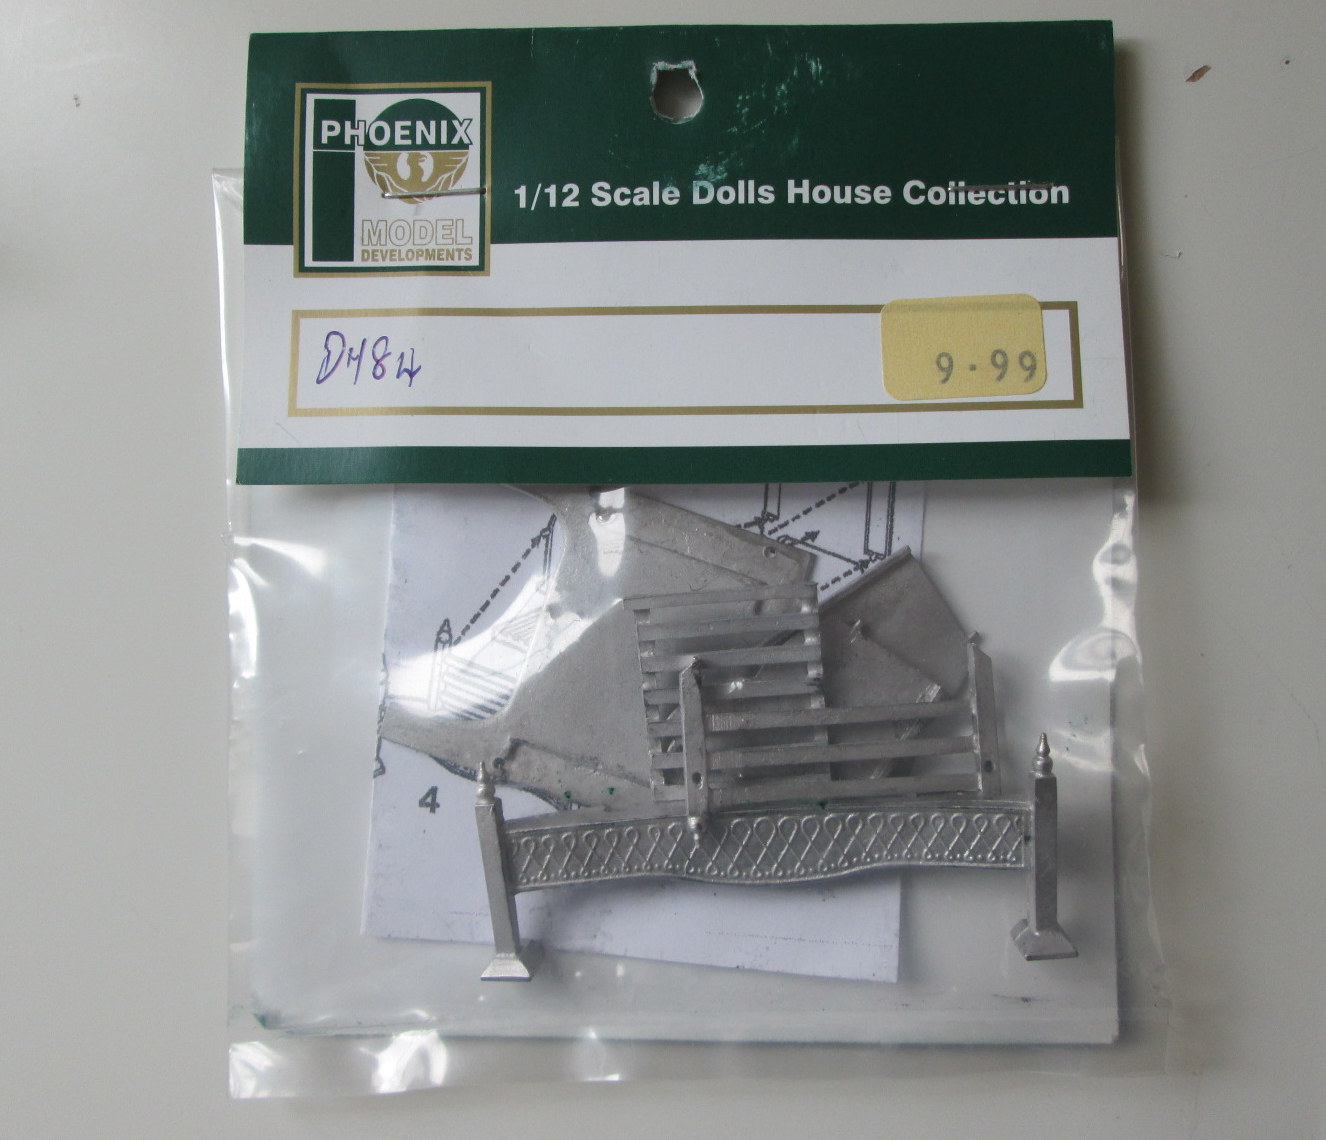
I totally love the things that Phoenix Model Developments make and have always used their fires where I could.  This time the whole house will only have their fire grates in it.

There is one small caveat and only because I am so fussy.....  if you are putting in the lighted coals you need to consider the relationship between the wire and the grate.  Do a sort of dry build and look at the diagram and figure out where you want the wire to appear and then exit from the fireplace.  In this particular model I didn't want the white wires to be coming down the front of the back plate of the fire - hope that makes sense.  It is very easy to drill a hole (it is very soft metal) with just a little hand drill and the wire can go where you want it to.  Also, as the metal is very soft you can always finesses the fit of the parts with a little squeeze if needed.  It rarely is.


The grate with the wire coming out of the back rather than dropping down and being visible at the front.


I have probably chosen the wrong fire to do this demo with as it has its own surround which covers the usual visible brick fire box that grates go in.  Here's a diagram of the usual construction:


Even though it wasn't really needed it seemed right to still build a firebox for behind the fire and to fill any tiny gaps between the fire and the surround.


A very kind mini chum sent me some foam-board (thank you) to have a go at making walls and cupboards and such like.  I thought this box would be a good stepping off point as it wouldn't be seen.  I marked up the opening I would need, gathered a scalpel and steel ruler and away I went.  I remembered the tip to cut it in three or more strikes of the knife, let the knife do the work, don't apply pressure and try the cut a nice squared off edge.  I did OK for my first go at the promising future relationship of foam-board and I.


All glued together and right angle joins not bad, measuring lengths not so good!!


Painted black in hopes it would 'disappear' it if it showed any where.  also made a corresponding hole for the wires.


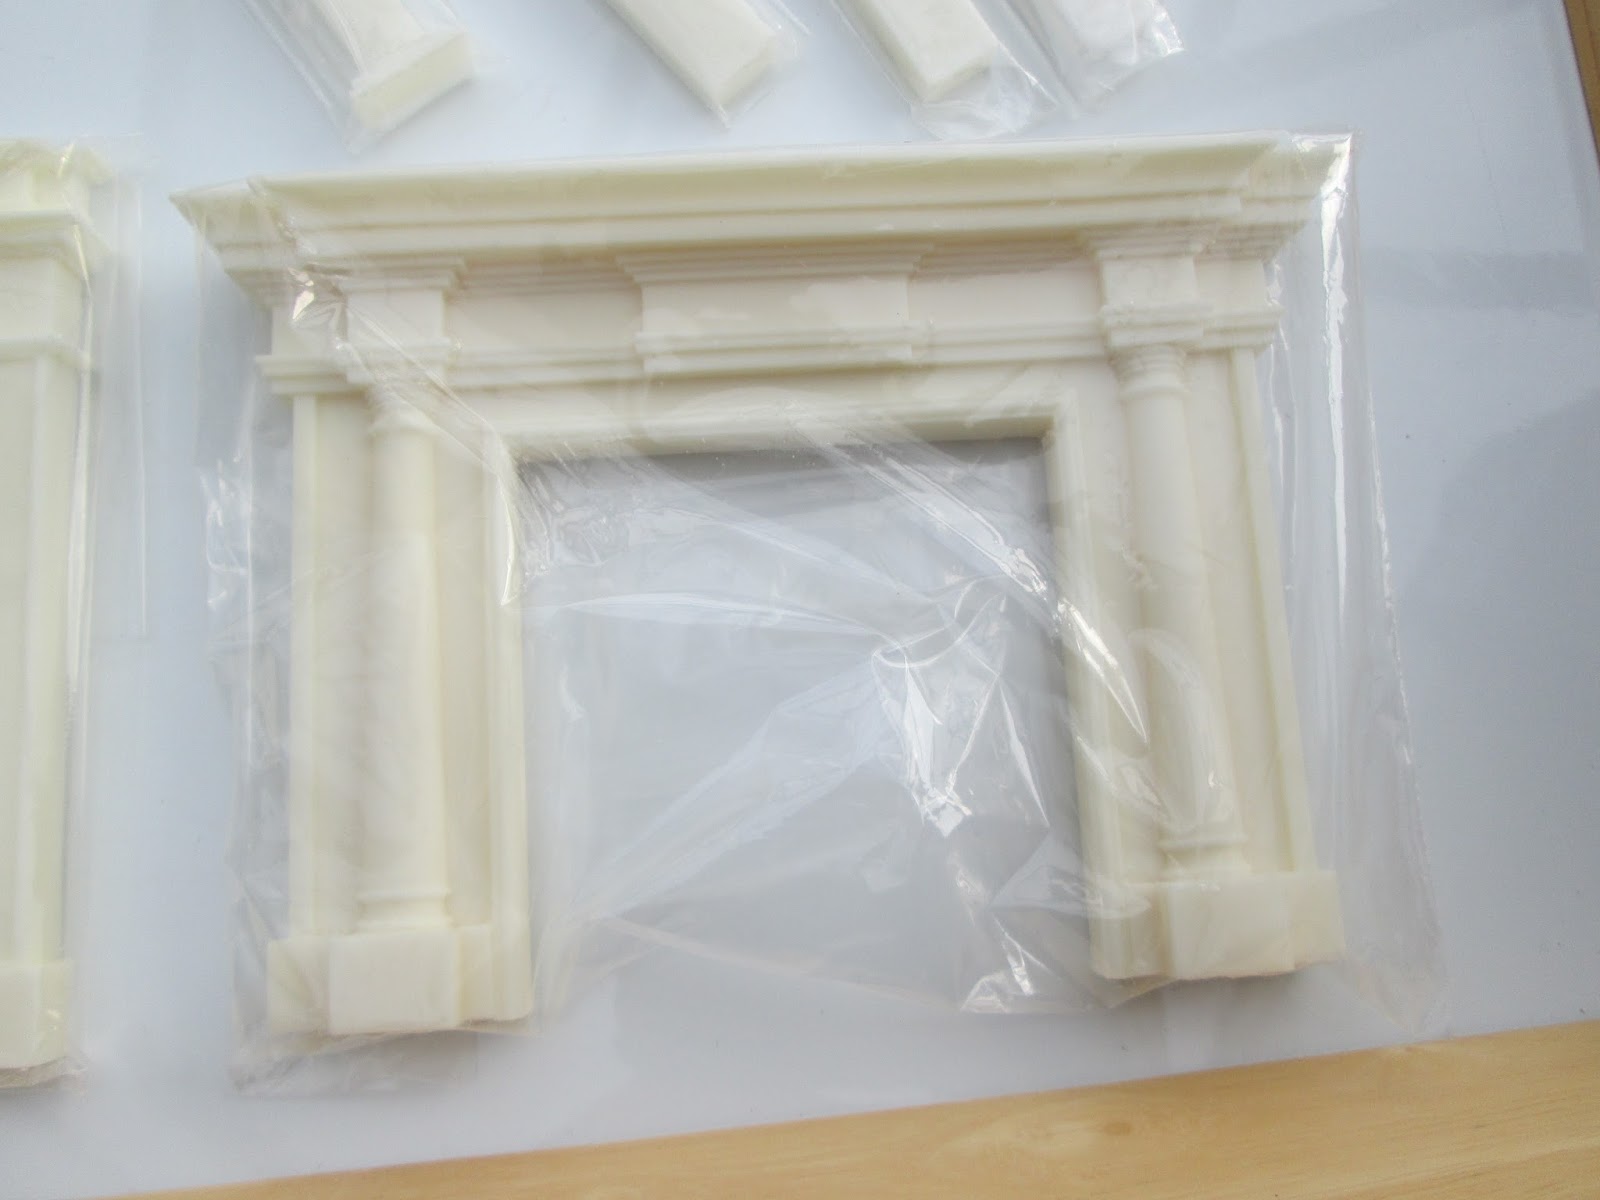
Test fit the front.  Seems OK.


As I said, this is a bit of an odd one as the firebox is now invisible behind the finishing plate around the grate.


Ultimately the chimney breast and fire box and grate will be fixed in the room and the wallpapering done before the fire surround goes in place.  Much easier to paper first than to fiddle around a fireplace.

I have ordered a hearth made of Decrastone - a mix of stone and resin - from Dollhouse Flooring .  I should be with me - cut to size and polished - when I get back from a few days away, so that should be my next post.

(09/05/16)


Saturday 12 November 2016

Fireplaces

I am starting work on the two rooms plus the hall on the ground floor and am currently flitting from sitting room to dining room and feeling unable to start on either.  I find it very hard to determine where I might want a chimney breast and/or cupboards or what size a fireplace should be etc when I have no idea what furniture I will be able to get or even what I want.

For example my music room is 21 inches wide which sounds delightfully capacious but in reality three inches of that is a 'pass through' so its usable space is 18 inches.  Still rather grand you might think.  Put a piano and seat in there and you would be astounded how much room is swallowed up - so then what sort of seating might I want in the remaining space and where is the fireplace in all this.

After a lot of faffing about I decided the first step should be sorting out all the fireplaces and fires and chimney breasts I have amassed for the whole house in an attempt to decide which should go where.  This merely created even more confusion.

I suspect I am not the only person who buys things as they go along ready for this room or that when we get there and then discover when we do get there that it was not the best choice.

I made one good purchase that I still like and is perfect for the room it was chosen for - the dining room.  I bought this fire surround from Newtonwood Miniatures (last year maybe) and it seems to have set the standard for all others.


I then went on to buy various Phoenix fireplaces and their coals for virtually every room in the house.


Some while after this my Georgian house became a 'modern' one and I no longer need five fireplaces!

I then went on to buy one too many fire surrounds at a recent show from Miniature Mansions.  No idea why I am unable to count up to two!


The top one proved too wide for the small grate I want to use in the very small library so I hacked it to bits to do a remake on it...... it now resides in the dustbin.  What to do with the other two?

Looking at the one I like (from Newtonwood) I wondered if I could dress them up with some marble inserts.  I googled marbled papers and printed a couple.  I then cut them super carefully to fill some spaces.


I ended up with a fireplace for the music room - the large dark green one and one for the sitting room which might be passable if used on a side wall rather than made a feature of and surrounded by furniture.  maybe a mirror or picture will distract?


As for the library I am talking to Newtonwood in hopes they might bring me a fireplace and surround to the York show.  A more expensive but a so much easier option.


(02/05/16)


Saturday 5 November 2016

Finishing the roof

Versi Slates from Staceys Miniature Masonry are even easier to do than the bricks.  They are larger so they cover an area faster.  They need very little fiddling around with to keep them on line and in regular rows.  It is a simple case of starting from the bottom and overlapping by half a slate on each row as you go up.

If you have dormers to get round it is best to make a template with a scrap of paper for any awkward shapes so you don't waste a lot of slates getting it right.  Cut some paper the same size as a slate, put in place and make creases with your nail in all the places that you will need to cut out.  Cut out and check the fit, then lay the template on the tile and cut out the finished shape to glue in place.


template

tile fitted around the dormer roof

I did the roof area fairly quickly and then bashed on with the dormers.  It would be easier if they could be done before gluing them to the roof, but the ones on this kit were a fiddle to get right and needed to lay on the roof as part of that process, so the dormer roof tiling had to be done from every which way with them in situ.


Calculating the number of tiles is never and exact science and it can be frustrating to have to order a few more to finish but equally annoying to have a ton left over.  This time, incredibly, I had exactly the right amount of basic tiles.  As the last one went in place I couldn't believe my luck.

topped with ridge tiles

At the end of the whole job I was left with zero amount of ordinary slates, five ridge tiles (upper left in the photo) and three one-and-a-half width slates (upper right).  


finished

Then came the always fiddly job of attaching the roof to the house.  This is never a part of the construction I  enjoy but has to be done.  I am afraid I can't offer any handy tips to make it easier.  It is just a case of marking up the screw holes carefully and pleading with lady luck..... oh and the ability to work from all sorts of silly angles, whilst standing on a step stool.


Initially I only attach the roof flap with a single screw in each bracket.  The other half of the bracket which attaches to the ceiling is fully fixed.  I know I will need to remove the roof  flap when I come to work on that area as it will need decorating and blinds added.  The hinge screws are very short and they don't take kindly to be putting in and out, so best to leave out what you can until the final fix.

just one screw in place

So here she is - warts and all - god bless her and all who live in her...........


Dalton House

(25/04/16)