This post, therefore, is just my record of this particular bit of my project.
Mostly my time was spent masking-taping up this and that for painting. The first round was to tape up for painting the three eighths of an inch divisions between the rooms. Again, this is purely a personal choice. No problems with joining up room to room. I do it because I like the outline it gives each space and it remains true to the build in that where these lines are there would be walls separating each room.
The 'doors' had already been primed with a thin coat of ordinary household matt paint. I do this when I open the flat back on all sides of the wood to stop it warping and sucking up glue and paint at a rate of knots when the finishing work gets done later.
The left hand side actually had two rooms already painted - I must have been on a roll at the time way back when.
 |
| before - masked ready to paint |
 |
| afterwards - crisp white lines |

I wonder if you spotted the mistake. For some odd reason I missed out the top and long side edges; so, more measuring and taping and painting followed these photos.
After this you will pretty much need to reverse most of what you have just done and outline the walls that need painting with more masking tape. You need to do all the painting needed before you do any papering, otherwise you will end up with masking tape on your wallpaper and believe me if it is at all 'porous' the tape can grip and mark it when being removed.
Hugely annoying on this kit is this perfectly cut, smooth, curved groove in the top and centre of the main door. It is like something made to receive a bolt but doesn't make an atom of sense in relation to where it is. I spent a very frustrating time trying to fill it smoothly.

You can see in the photo below that as always I never obeyed my own rule and I fancied doing a bit of papering before I did any more painting. That's how I discovered my original plan really was the best one! So, do as I say, not as I do and finish all the painted areas first.
To begin papering the wall space I made my usual template so I could cut out the wallpaper exactly. Remember to flip the template before lying it on the back of your paper and marking up for cutting.
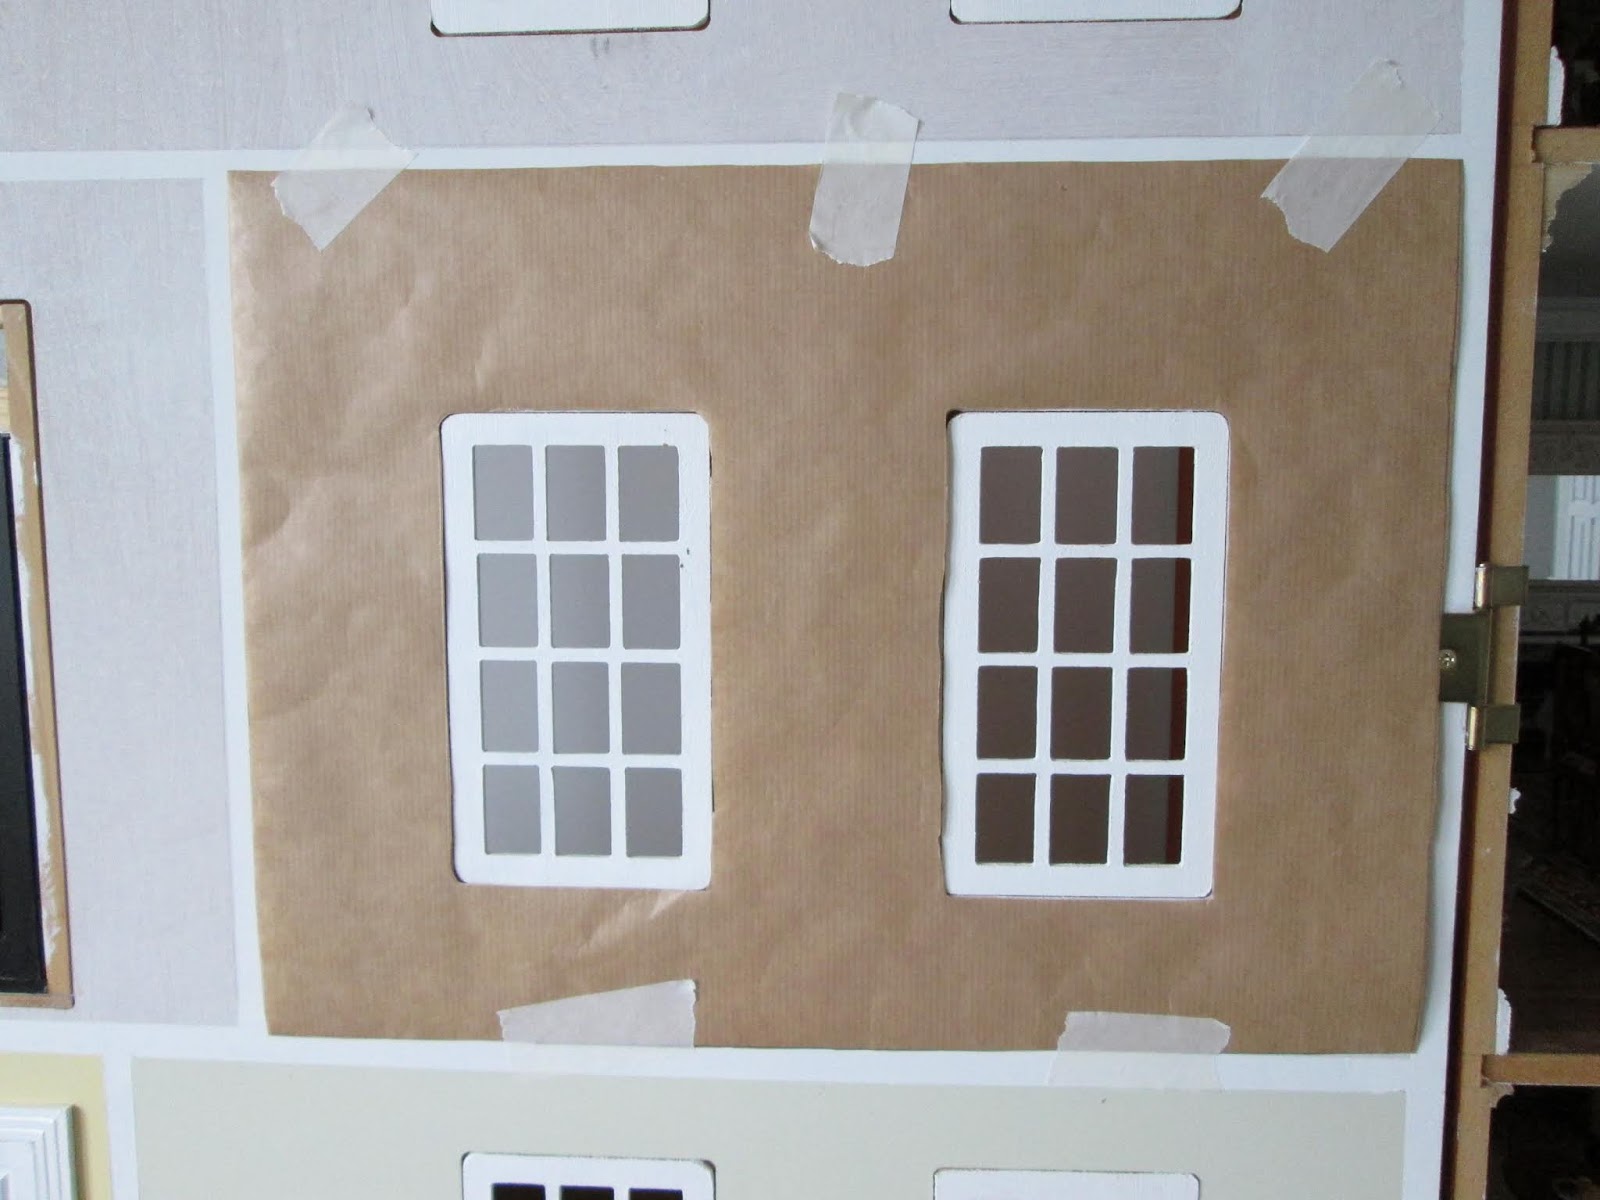
Dry test your cut wallpaper in place just in case you have made a mistake. Better to find out before the glue goes on. So far, so good.
When I pasted it (I use wallpaper border adhesive) and tried to hang it, absolutely nothing went right. Hand on heart I can't remember ever having a problem hanging paper so I have no idea why it all fell about my ears this time. The paper sagged and stretched and immediately clung to the surface (MDF is like a sponge) even though the wood had been primed as usual. This meant there was little or no way to move it about to adjust it. All of that resulted in a right cod's ear round the windows and it just had to come off. Well, yes, that would be fine if if had just come off. It seemed to have dried instantly and would not budge.
I had to resort to actual wallpaper stripping - dampening down and scraping off. Took ages to get back to a nice smooth surface and equally long clearing up the mess.
I was using Dolls House Emporium paper in this room so if you have any just try a test piece first to see what it does. Probably a good idea with any paper. This was decidedly like trying to wallpaper with blotting paper.

I gave up on any idea of papering the window wall in one piece. There is an easier way to get a good end result and is especially forgiving with stripes.
This wall has been papered in seven pieces. Three floor to ceiling strips and then two strips at each window to top and tail them. If you do have a sheet big enough to cover the whole area the joins will match perfectly.
Simply cut five strips. Number them on the back as go you from left to right and label the top and bottom of each piece. Strip one is the width of the space to the left of the window, strip two is the width of the window, strip three is the strip between the window etc.
Paste strip one in place. Take strip two and cut the paper to fit above the window making sure your top line remains your top and then the remaining part of the strip is to cut up to the window making sure the bottom is still at the bottom. If you are careful with keeping your paper in the right order and right orientation when you come to butt the pieces together it will be a perfect match because you are simply reassembling the cuts you made when turning your original rectangle into five strips.
If your windows will have curtains they will cover most of these 'seams' any way.

Finally here are the two 'doors' painted and papered. Ready for the next stages.


On the left side I also added a couple of things. I finished painting the the door trim around the door and then added the architrave on top. I also popped in the glazing above the door. The door bell was added with the bell push outside and the bell box glued to the hall wall inside. The door locks were then finished off. The Yale lock and dead bolt needed the their other halves (the boxes) fitted.

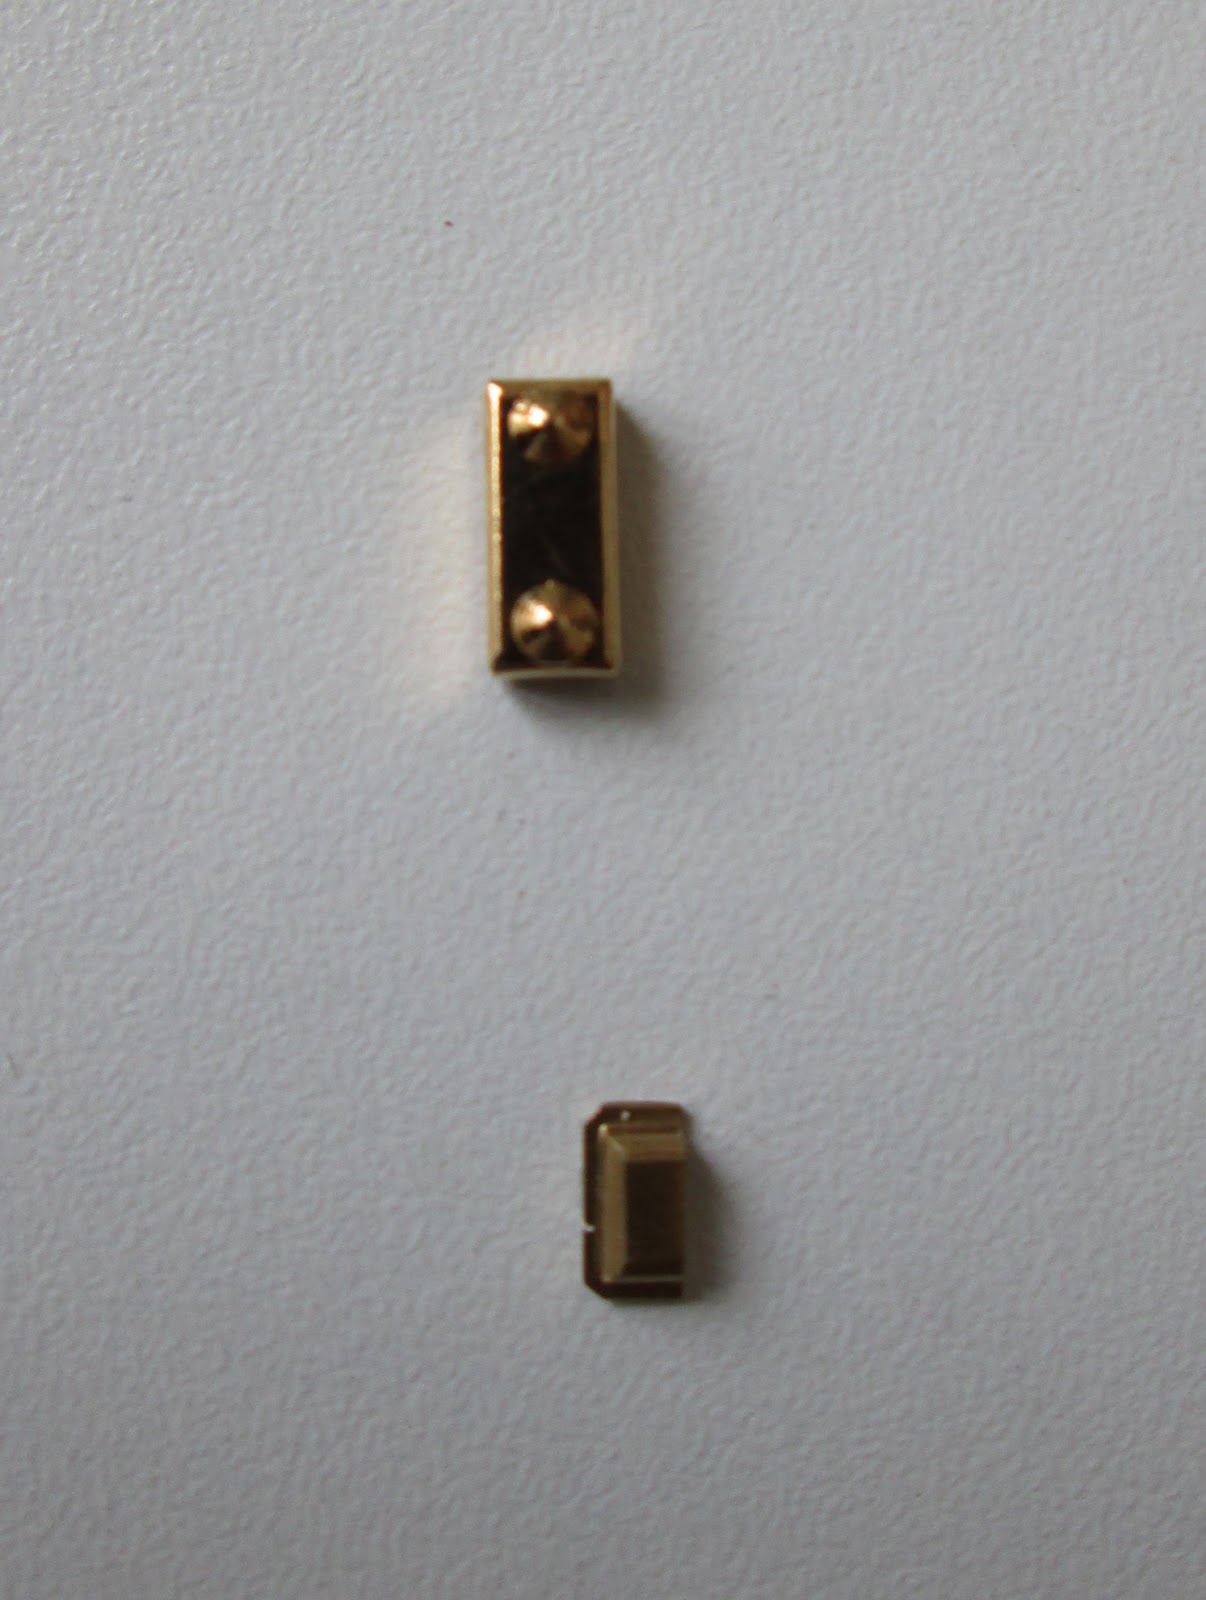
The box for the deadbolt was too big for the space I had and I decided chipping a little out of the architrave to squeeze it in wouldn't look right. I discovered it almost fitted the space if it was turned on its side, I just needed to file off the bumps which represented the screws. Necessity is certainly the mother of invention when it comes to dollhousing.
 |
| I love a bit of remodelling |
 |
| all sorted and complete |
I am not able to add the dado rails in any of the rooms at this stage because, like a lot of things in RL building, one stage is often contingent on others being in place first. The order of work now is:
- fit lower window frames and glazing
- paint and fit architraves around the window
- then the chair/dado rails can go in
- make 5 pelmets and curtains
- make 4 curtains and put up 4 brass poles for these
- make and fit 7 roller blinds
- add any wall decor such as paintings and mirrors to the fourth wall
I had every intention of also adding each room's coving and skirting boards and I have even just bought extra pieces and paint to do that. Luckily I realised when messing around with the potential dado rails that the windows aren't in a uniform place from room to room and the ones on the upper floor were very near the bottom of the wall. It suddenly occurred to me that there wasn't enough room for the skirting board. It turned out to be a very snug fit and looked decidedly odd with the skirting butting up against the bottom of the windows. So in deciding not to do those it also meant I wouldn't be doing all the other ceiling and floor trims either. There would be no logic to all the rooms having their trims except the two and they are major ones.
Obviously I am not happy about the money I spent on trims and paint that's not needed now, but there is an upside...... I won't have to paint and fit all these .......

My huge tips following all this are
- if you intend to do something about your fourth wall be sure your ideas will work by dry testing things where you can at the very beginning of your build
- be absolutely sure you have enough paint, paper, trims whatever you need to finish the whole job when you first order them .
- take your time and think about the order you need to do the work in: a couple of half hours doing this will save you hours of workarounds later.
---------------------------------------------------------------------------------------------
PS: I just ordered a sample pot of paint from Farrow and Ball and there was no shipping charge. Mind you they do cost £4.50. I usually use Valspar test pots from B & Q. They have thousands of colours and will mix it as a matt or a silk paint. Cost £3
This was an informative post Marilyn and it was interesting to see your process for achieving your very clean and even results.
ReplyDeleteWallpapering Well can be a time consuming and frustrating experience especially if the paper wrinkles and stretches, or lifts and bubbles as it dries. I have wasted more of it than I care to mention, but once it's on the wall, and you like it, then all of those previous disappointments seem to evaporate.
Hi Elizabeth. It was a good 'bad' experience for me because I always wondered what folk were doing wrong to have such a hard time with papering - talk about smug! Clearly it is all in the luck of the draw with the materials being used. As you say done and dusted and I feel a whole lot better. At this stage I think another primer coat would have been a good move. The one I had certainly wasn't sufficient.
DeleteWhat a neat and careful process, Marilyn, and even the boo boos were no match for your quick problem solving skills. I have always wondered about the challenges of a front opening dollhouse and hope to someday get the chance to experience building a kit version myself. Very good tips here to keep in mind!
ReplyDeleteI think even the most experienced dollhouse builders will agree that this is one challenging hobby that keeps us all humble. Your results look beautiful and professional, and no one would guess that you had any obstacles! I hope you can find a satisfying way to make use of the extra trims, even if it's to pass them on to a mini club or the like.
Hi Jodi, thanks as always for stopping by. I don't know how you manage all you do never mind make time to visit other folk but we are all so happy you do. Thank you for the pats on the back, always appreciated. I am certain the trims will find a good home when I come to do the huge clearing out at the end of this project. I can see more years selling, donating and generally digging out my workroom than I have spent actually building things.
DeleteI think it looks wonderful! Tape/paint bleed... oh boy... timing is really everything isn't it? I love how your stripped paper came out and everything looks crisp and fresh.
DeleteThank you Sheila, sorry taken time to reply but your comment got buried in Jodi's comment so it didn't pop up and notify me. Yup, never confident when taping and painting but I was lucky with this lot - can only think the MDF sucked it up too quickly for it to make a fuss. Thanks for the crisp and clean comment - story of y life - one of these days I will manage rumpled and crumpled.
DeleteWhat a great post Marilyn. To see the steps taken and written down in order to deal with this "fourth wall" is really helpful. I just blunder on and hope for the best! You've made an excellent job of it and it's turned out perfectly, right down to the little locks etc.
ReplyDeleteThat's a pity about the skirtings etc. though.
Thank you Irene. With you being the queen of fourth walls this means a lot. I did finally realise how much easier your life would be if you did things in the right order, for sure.
DeleteThe locks are marvelous! Great use of basic minis! :D
ReplyDeleteThank you. I hope you managed to squeeze your locks in OK in the end.
DeleteHi cannot believe i have finally found a Dalton blog �� i have started one and as you probably already know the windows panels are a nightmare. Any tips on paint method etc. Tried brush and spray and still look rough.
ReplyDeleteAmazing blog thank you ❤️
I can't remember them being especially difficult but you might be right. Generally I would sand first with very, very fine sandpaper, make sure you remove all the dust, paint in a very clean area so you don’t pick up any bits and bobs. Thin coat of satin acrylic paint, sand again, dust well and repeat. Two thin coats should do it but no harm in a third if you have the patience. Welcome to Dalton world.
ReplyDeleteJust clicked on windows link in left hand margin and the post pretty much says what I just said with photos
DeleteReading that now thank you
ReplyDelete