 |
| Finished at last! |
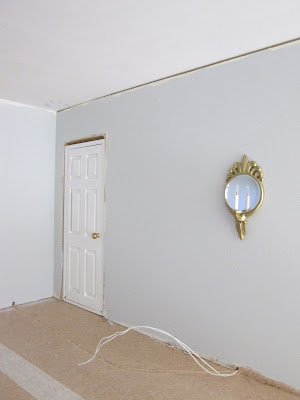
Glumly, typing this, I now think I should have settled for a painting over the fireplace and each of these lights either side of the chimney breast - they would have lined up nicely with the windows. Especially as the original mirror which was bought for the music room is now in the dining room! Hey ho. Any way ....
Off to the side walls....... you have suffered along with me already as I went though these trials and tribulations so, finally, you'll be glad to hear this is the day they can actually go in place, but they still had two nasty surprises in store for me.
When I drilled the holes for the wires I obeyed my real life rule of all paintings and mirrors should have their centre about five feet (plus a bit if you like) above the floor so that the viewer is looking pretty much into the centre of piece and so has the best viewpoint. I drilled the holes accordingly.
When I came to thread up the first lights/mirror it was miles too high on the wall. Only then did I realise that the wiring in the mirror was 3/4 inch below the centre so they had shot up nine inches in real world terms. Why did I ever assume the wires would be in the middle - truth is I didn't,I didn't even consider where the wires were - ten points for stupid.
 |
| wires at the bottom not the centre |
First task then was to drill another hole in each wall three quarters of an inch below the current one. This time I did have enough sense to check that the mirror would hide the original hole when it went up.
As always, I tested that the lights were working by touching each wire to each terminal of a nine volt battery. Test at every single stage of the following process then, if something goes wrong, you only have to back up one step.
 |
| test, test, test |
 |
| now have three holes where there should be two |
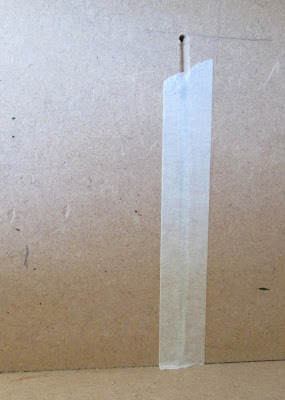
No points for spotting what I didn't think about in advance again!!! The wire isn't long enough to reach the back wall.
 |
| oops |
So here comes a lesson in how to extend round wiring.... preferably before you super glue a light to a wall.
Favourite tool is this....
 |
| adjustable wire stripper and cutter |
Firstly cut the new extension piece of wire off the roll, carefully checking it is the required length.
Split the ends of the wires into the two channels. You can just about see the separation. Use a sharp knife or razor blade, scissors won't usually do it. Make sure each set of wires is still plastic covered. Usually just need to cut a little to get it started and you can then gently pull the wires apart.
 |
| cut carefully to split wires into two |
 |
| long side and short side on each wire |
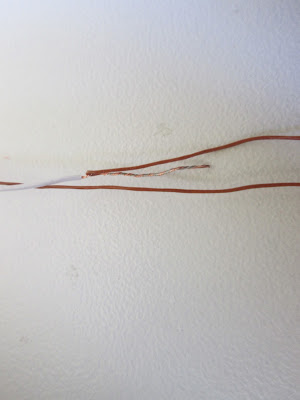
Join the short side of one wire to the long side of the other wire and twist the wires together really well. This is probably the most important step, you don't want the wires to separate further down the process. Ideally at this stage you should solder them. I have never, ever soldered a wire in my life and, as far as I know I have three working houses out there somewhere - they were when they left me. I have also heard about coating the wires with nail polish.... again I can't vouch for it as I have never done that either.
 |
| twist carefully |
Fold the twisted wire back on itself against the plastic covered flex
 |
| fold back on itself |
Do that in the other direction with the other wire. In the picture below I hope you can see that the bare wires can not touch each other. The red wire is the wire from the light and the white wire is the extension piece.
 |
| no wires touching |
Generally at this point I just lay my wires into their grooves and tape them down. I work on the notion that no one will be fiddling around with them as they will be going under a wood flooring eventually. This time I decided to do the 'right' thing and cover the join with shrink tubing so I could show you how it is done. This is just a clear (ish) plastic tube like a flexible straw.
 |
| can be bought in one length or cut in pieces |
 |
| cover the join |
You then heat the tube with a hairdryer - be brave and use it pretty close up to the wires and, with luck, the tubing does what its name implies and it shrinks over the join making everything secure.
 |
| melt to fit |
The end result is only marginally thicker than the original wiring and should still fit in your grooves unless you were very skimpy with them.
Ta dah, finally, one light in the right (!!) place at last. Repeat on the other wall and we are good to go.
 |
| sigh of relief |
(7/5/17)
Despite all the trauma, they are very lovely wall lights!
ReplyDeleteThanks Sharon. I do still like them and worth all the fuss I made.
DeleteThere is a lesson to be learned here Marilyn, that by going with the flow even a minus can be turn into an A+! :)
ReplyDeleteelizabeth
Decidedly so......
DeleteThese are lovely lights so I can see why you were attracted to them. You got there in the end and I appreciated the shrink tube info. I've not used that (yet) but will be investigating.
ReplyDeleteIf you are rummaging around for it find the thinnest and clear. That's what I've always used but Romney's not selling it any more. Maybe all the other stuff works just as well? It is supposed to go over a soldered joint but I can't see why that's needed if you are careful about twisting the wires together properly. Build four and loads of lights on all of them and no problem yet.....famous last words. M
Delete