Sunday, 17 February 2019

Some more lighting details


I had no intention of blathering on any more about lighting and then I opened the pack on the light for the kitchen.

This a Heidi Ott light and, initially I thought it had come with a spare bulb


even getting it out of its packaging is a challenge


Then I remembered - Oh, No - it is one of those that you have to fiddle the bulb in yourself.  I remember a conversation with Ray Storey once, years ago, when I was buying some lights from him for my Chocolat project and he gave me the shades and the bulbs separately.  'It is dead simple - they have two pins and there is a two pin socket you just slide them in gently'.  I think it was a task I may have wept over.


one two pin socket, so so tiny


one tiny bulb with two wires for the socket currently squeezed together


Nothing for it but to give it a go.  Remove the lampshade and spend a jolly five minutes trying to adjust the two wires on the bulb to exactly the right width apart so they can 'slide gently' into the socket


yeah, success!


This one definitely needed testing after all that faddling around


This photo shows one of those foam pads I was talking about in my previous lighting post - you can see how they will make a light stand away from the ceiling - 


...........off it came and some super-glue gel was applied carefully to the inside edge just as it was about to be pulled into position.  I think I read somewhere not to use superglue near lighting - melts the plastic over the wires maybe???  So I maybe giving you rubbish tips here.  All I can say is I have made four other projects prior to this and the lights worked in all of them.  Obviously you don't apply globs of the stuff.


Having emptied the kitchen to fit the light gave me a chance to add the coffee maker and the toaster, both from Delph Miniatures.


Here we are so far, ham salad butties and coffee for two


I love Amanda Speak's work.  She is my go-to food person and has made stuff to order for me that was the bee's knees and at her ordinary prices.


I will have to have a word with her about too much fat on the ham


So, only one more room to light and I will be ready to actually get the whole house lighting set up and working.  The problem here is I can not decide what to do with this room.  This is the current position of the furniture and I have another chair, two wall lights, one standard lamp and one table lamp available to me.  I also have a large screen TV and a wall mounted fire and/or radiator that could go in.  Until I can settle on some definitive arrangement I can't add the lights.  If you see a brainwave/obvious solution in this muddle do, please, let me know.


One dilemma is that I am not sure about the table and stool at the front of the room for Annelise to do her work on - the seat is not comfy and the table is narrow and she has a table in her bedroom that she could use.  I could split them into a console table with plant and nick knacks by the window (as is) and the stool becomes a side table by the sofa to park your coffee????   I think I want a table front and centre as it creates harmony with the other two rooms when the roof is opened.


PS:  Just in case you don't read the comments at the bottom, Fran Casselman from Hobby Builders Supply came up with this handy tip should you run into a light that needs a bulb putting in.

There is a trick to it:  If you cut one wire slightly shorter than the other, then fit the longer wire into place, it helps anchor the bulb so you can position the shorter one.

I swear I had just thought of this as a possibility as the bulb slid into place, but I didn't suggest it as I hadn't tried it.  Thanks Fran.

Friday, 15 February 2019

Glue - the magic trio


All you ever wanted to know about glue but were afraid to ask.

Well, more like the little I know about glue in hopes it helps.

Pepper asked me a couple of post ago if Fray Stop works.  Me, being me, set off thinking about all the various glues I have used over the years.... and there were many.  Now I use just three (if you don't count using up some leftovers of other things - hence the Fray Stop mention.

I will start with the ubiquitous PVA which pretty much does everything.


Image result for pva glue images
My first glue

The basic pot of PVA comes in all shapes and sizes so, clearly, if you are going to use it for just about everything buy a reasonable size pot...... not too big because over time it will begin to thicken.  That's not a tragedy as you can let it down with a little water but why make yourself work every time.

Poly Vinvyl Acetate (C4H602)n.

All the usual glues are PVA in various guises:

  • wood glue
  • white glue
  • carpenters glue - yes even the yellow stuff
  • school glue
  • Elmers glue
  • etc etc
The problem you will have is trying to decide if any of these have been tweaked in any way that may or may not help your project - have they been made waterproof? do they have added gloss? how thick or thin are they? do they have some sort of rapid bond added?  To be honest after years of buying a specific glue for every specific job I have come to the conclusion it really doesn't matter and an all purpose straight forward PVA works just fine.  I do tend to buy white wood glue as that is probably PVA at its thickest - after that I can let it down with water depending on its use,

So I use it for 

  • gluing wood as it is
  • let it down a little bit for paper jobs
  • mix it 50:50 with water if I want to prime a surface before painting
  • watered down for decoupage finishing like you would use mod podge
  • bit thicker for sealing floors and tiles (adding gloss if needed)
  • you can make your own Mod Podge with 1 cup PVA and 1/3rd cup water.  Add water based gloss varnish if you want a shiny finish.
  • the Mod Podge mix also works like Fray Stop and will glue fabric and stop frayed edges.  It won't be waterproof though and so will wash out if you wash the item.
  • I have watered it down a little to use as wallpaper paste but here is my exception to my rule I do prefer border paste already made up for wallpapering it seems to go on easier.


Image result for images B and q border paste
My second glue


Being kind I will give manufacturers the benefit of the doubt and assume they tweak PVA in subtle ways to make a glue for a specific job but as the ones I have used aren't inclined to tell us anywhere what their glue is actually made of I have my doubts and think I am buying PVA with differing degress of water content.

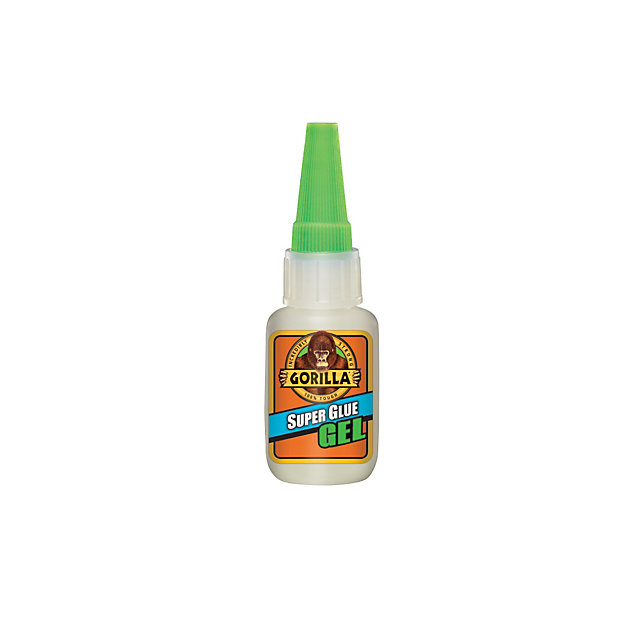
I do use super-glue in any circumstances where PVA won't bond a particular material or where I need an instant and strong grip - like putting up ceiling lights.  It must be gel - the runny stuff is fatal in mini settings.  Any make will do.

Gorilla Gel Superglue 15g
My third glue


If you do have a peculiar job to do - like sticking leather to glass (why would you???) and wonder what glue you might need then I recommend Deluxe Materials.  They have a huge range and their site is full of useful information and any glue I have had from them has been excellent.

Thursday, 14 February 2019

Bedding kit from ELF


Like the mattress, I could make a duvet and pillow set from scratch - basically three stuffed bags - but rummaging through ELF's sale I spotted a set I liked and in an inexpensive kit form.  The colours worked well in my green apartment bedroom and I wouldn't have to lug out my sewing machine or, even worse, spend the days I know I would spend trying to decide which of my zillion fabrics to use.  I dread getting that particular box out.  Roll on making curtains and blinds  ....

So, here we are with ELF's bedding kit.  Firstly the fabulously written and illustrated instructions:


Here are the components.  One duvet stitched on three sides, with a small opening to enable you to turn it to the right side and fill it.  The gap is very small and turning it to the right side is a bit fiddly - just have a little patience when you are doing it and it will happen.  There are also two pillows in the pattern fabric and the plain red.  I might make two cream pillows some time as all my real beds have two plain ones to sleep on and two to complain about and chuck on the floor every night..... but the bed looks nice.


First job is to trim all the corners diagonally to remove some of the bulk when you turn the bag to the right side.  On the pillows you don't need to trim the corners at the open edge.


Turn the bags to the right side.  Initially the corners will look like this which clearly won't do.


Use some smooth small object to help you poke out the corners into a sharper shape.  I have sewn for years so I do risk using the points of scissors but you need a gentle and practiced touch to do this without damaging the stitching.  I tried to do this as if it were my first experience of sewing so I pushed out and shaped the corners (from the inside) using the rounded end of a pair of long tweezers.  It worked just fine.  If you had a mini iron and attachments this would be a cinch to do.... more of this later.


Quite definitely iron your pieces flat making sure you pull them gently into the shape you want and that the seams are lying nicely.   A mini iron is perfect for this!!


 I wish I hadn't been so mean throughout all my dollhousing years and had invested in a mini iron; time and again I wish I had one when doing something.  Here's an example of one.  If you aren't mean like me, just Google 'mini iron' and you will be able to find them for under a tenner right through to forty or more pounds.  This is the one I would like because it has loads of attachments for doing all kinds of nifty jobs.


Image result for mini iron images


When you have the pillows turned and ironed you will need to fold in about a quarter of an inch at the top.  This is fiddly.  The only tip I can give you here is....... if, like this one you have two different fabrics (cotton and cotton/polyester) decide which is the worst one to iron and then crease in and fold the top over with that side uppermost.  So, for this project, the red side was polycotton and is a bit of a pig to get a crease in, so I folded my quarter of an inch edge over with the red side uppermost and pressed hard with a steam iron.  I then opened up the bag, turned that red edge inwards and then worked the cotton side of pillow to turn inwards the opposite way to the way it had been ironed.  I hope that doesn't sound too convoluted.  Oh how I would have liked a mini iron that would just go round round the whole inside top edge of the bag. When you have succeeded in wresting with small pieces of fabric, catch it quickly with the iron before it all springs undone and press well.  The one of the left in this photo is ready to fill, the other is awaiting three falls and a submission.


I mentioned in the previous post That I have used sand before to fill cushions and they make terrifically posable objects but mine were prone to leaking a little sand now and then if I messed about with them.  I moved on to preferring micro balls - styrene ones from a cheap plush toy from a pound shop.  The very best answer is micro beads.  They are just perfect but I am out of them right now.  Google 'no-hole glass micro beads' and you will find a ton of them at all sorts of quantities and prices.  Believe me they are the absolutely perfect solution.  They are easy to handle - the styrene ones just want to fly everywhere as they seem to be always elctrostatically charged.  With the glass micro beads just work over a tray to catch the odd rogue and you'll have it cracked and will end up with a reasonably weighted, nicely 'stuffed' cushion or pillow etc which can be pummeled and poked into all sorts of shapes to lie naturally on furniture.  Terrific for a bean bag for your little people or for smashing a dent in the top of your settee cushions which seems to be the latest (RL) fad.

Sand...... and all other fillings......  is easy peasy if you have a small funnel (three in a set, very cheap from a cookery shop).  Can also make a funnel from paper, foil, card, whatever comes to hand.  Decant the sand into something sturdier and spoon slowly into your funnel, testing all the time for the amount of filling you want by lying the pillow down and gently flattening the sand inside.


Repeat with the other pillow and the duvet and then stitch up the small gaps carefully.  Very small stitches and pulled tight.  Dress your bed.


This picture is just to show how you can lob them down so they look rumpled - took about two seconds of flinging them in place.  Simply won't do for Mrs Freaky Tidy though.  Even if my PhD student wants to live like that I can't stand to look at it, so she will jolly well have to make her bed like the rest of the household.  Actually, being French, it is more likely she would (quite rightly) leave her bed turned back neatly to air.


It's getting more and more like a bedroom.


PS:  I have just ordered a mini iron.... just now I can't think of a thing I might use it for!

Tuesday, 12 February 2019

Singing ELF's praises again and a mattress

I have no shame in praising ELF Miniatures once again....

I love this bed which I bought as part of a complete bedroom set from Elizabeth/ELF ages ago - apparently it wasn't a big hit, so I  suspect there aren't many of them around.  It is beautifully made


Look at the amount of pieces used to make the base and the lovely joints


Just a little bit of shaping to the legs adds a mile of style


Gently waxed stain finish perfectly in scale, with just enough sheen to finish the wood.


.... and so to the mattress kit.

I am capable of making a mattress for the bed having done so a few times and in different ways.  I have used thin foam and cardboard rectangle covered with fabric; have sewn a box shape mattress and down filled it and buttoned it and have made other methods depending on the needs of the bed and the time in history.

This time I saw Elf's mattresses and bed linen sets in her sale (you can still snaffle a couple if you are quick) and thought why not reduce the labour and go for a couple of kits.  She also sells them ready made.

Here are the components of the mattress kit......

Lovely clear instructions as always.  They never assume any previous knowledge so are very detailed and helpful.


There is a balsa wood base, fabric to wrap round it and a piece of iron-on fabric to neaten up the wrong side when you have finished.  She also incorporated some webbing so you don't even have to use glue if you don't want to.  Iron the fabric.


Oops, my bad, never thought to check the size of the 'double', forgetting that I had a bit of a special bed......


Easily remedied, I just cut and added a bit more balsa - leftover from my bookmaking period.  A bit of wood glue added and a couple of clamps and off to put on a bolognaise sauce and throw it in a slow cooker so I can work on uninterrupted.  By the time that was done the two pieces were well glued and I was ready to crack on. 

Instead of balsa wood you could use stiff card and thin foam or, indeed any material which is firm and gives you the depth you want.


It looks a bit crude but works perfectly well.


I then picked up some soft 'wipes' of some sort that I had kept as a 'just in case'.  I have no idea what the fabric is - very light and soft and fuzzy and came in some sort of medical pack ages ago.

I had a notion that the wood edge might look too 'sharp' and though this might soften them up.  Take care if you add bulk that the end result will still fit the bed.  Mine was a very close call.

If you are any good at covering books or wrapping parcels this is as simple as that.  Basically you are wrapping the wood with the fabric keeping the corners as neat as you can.  Fray stop is excellent for doing just that.


I had a bottle of Fray Stop which is 'going off' - the glue is getting thicker and less usable so I stirred in a teeny speck of water, mixed well and used that to glue down the fabric, starting with the gauze stuff.


Glue down two parallel edges then trim off the unwanted fabric like this, ready to turn over the last two edges with no excess


Here it is from the good side, looking a little softer and more inviting to sleep on.  I did iron the cotton from the pack but clearly never ironed this!


Place this, right side down, on the bottom sheet fabric.  Ideally any fabric you use for minis should be washed first to remove the starchy finish in it so that it will drape better and always cut off the selvedges as they are very unforgiving when trying  to mould round things.  Fortunately this didn't matter in this instance as I was dealing with a straight edge.


Trim this top fabric in the same way to remove excess.  You can see the first cut here, the second cut would remove the excess fabric ready to make the turn.  You are basically cutting out the rectangle of fabric in the corner that is not needed.


This is the finished back with the fabric neatly folded around the base. You can leave it just like that as it will never be seen once it is on the bed or....


Glue on a finishing piece to cover the raw edges.  This kit has a piece of iron on cotton to do the job easily.  It is a bit too small as I had to enlarge the base.


Eh, voila, one Ikea type mattress in one Ikea type bed.


Thank you Elizabeth at ELF.