
Media centre with TV. - This was an easy build after having done so many of ELF's 'Eazy' kits. Start by sorting out which pieces need painting and how much; get that prep done.
This kit has a lot of Fablon covering so most of it needed an acrylic base-coat to give it a good surface for the glue to adhere to. It isn't at all happy sticking to the bare wood.
Leave to dry overnight if you can. Rub down very thoroughly and carefully with the finest 'sander' you can - I use a painter/plasterers grade which is extremely fine- bit like a rough cloth - you can see a piece of it in the photo. Equally importantly, clean off all the dust. It is essential the piece of wood is silky smooth and dust free if you want a good finish and good adhesion.

There are excellent instructions for using the Fablon in the Eazy kit instruction manual from ELF but here's how I do it. Firstly cut a piece of Fablon large enough to wrap around the area you want covered and stick the face down that you want to cover. I then make sure that it is pressed down as neatly and firmly as possible. I usually 'roll' it across the rounded edge of my work surface.

Trim off the excess from the side which will not be covered, with a knife or small pair of scissors

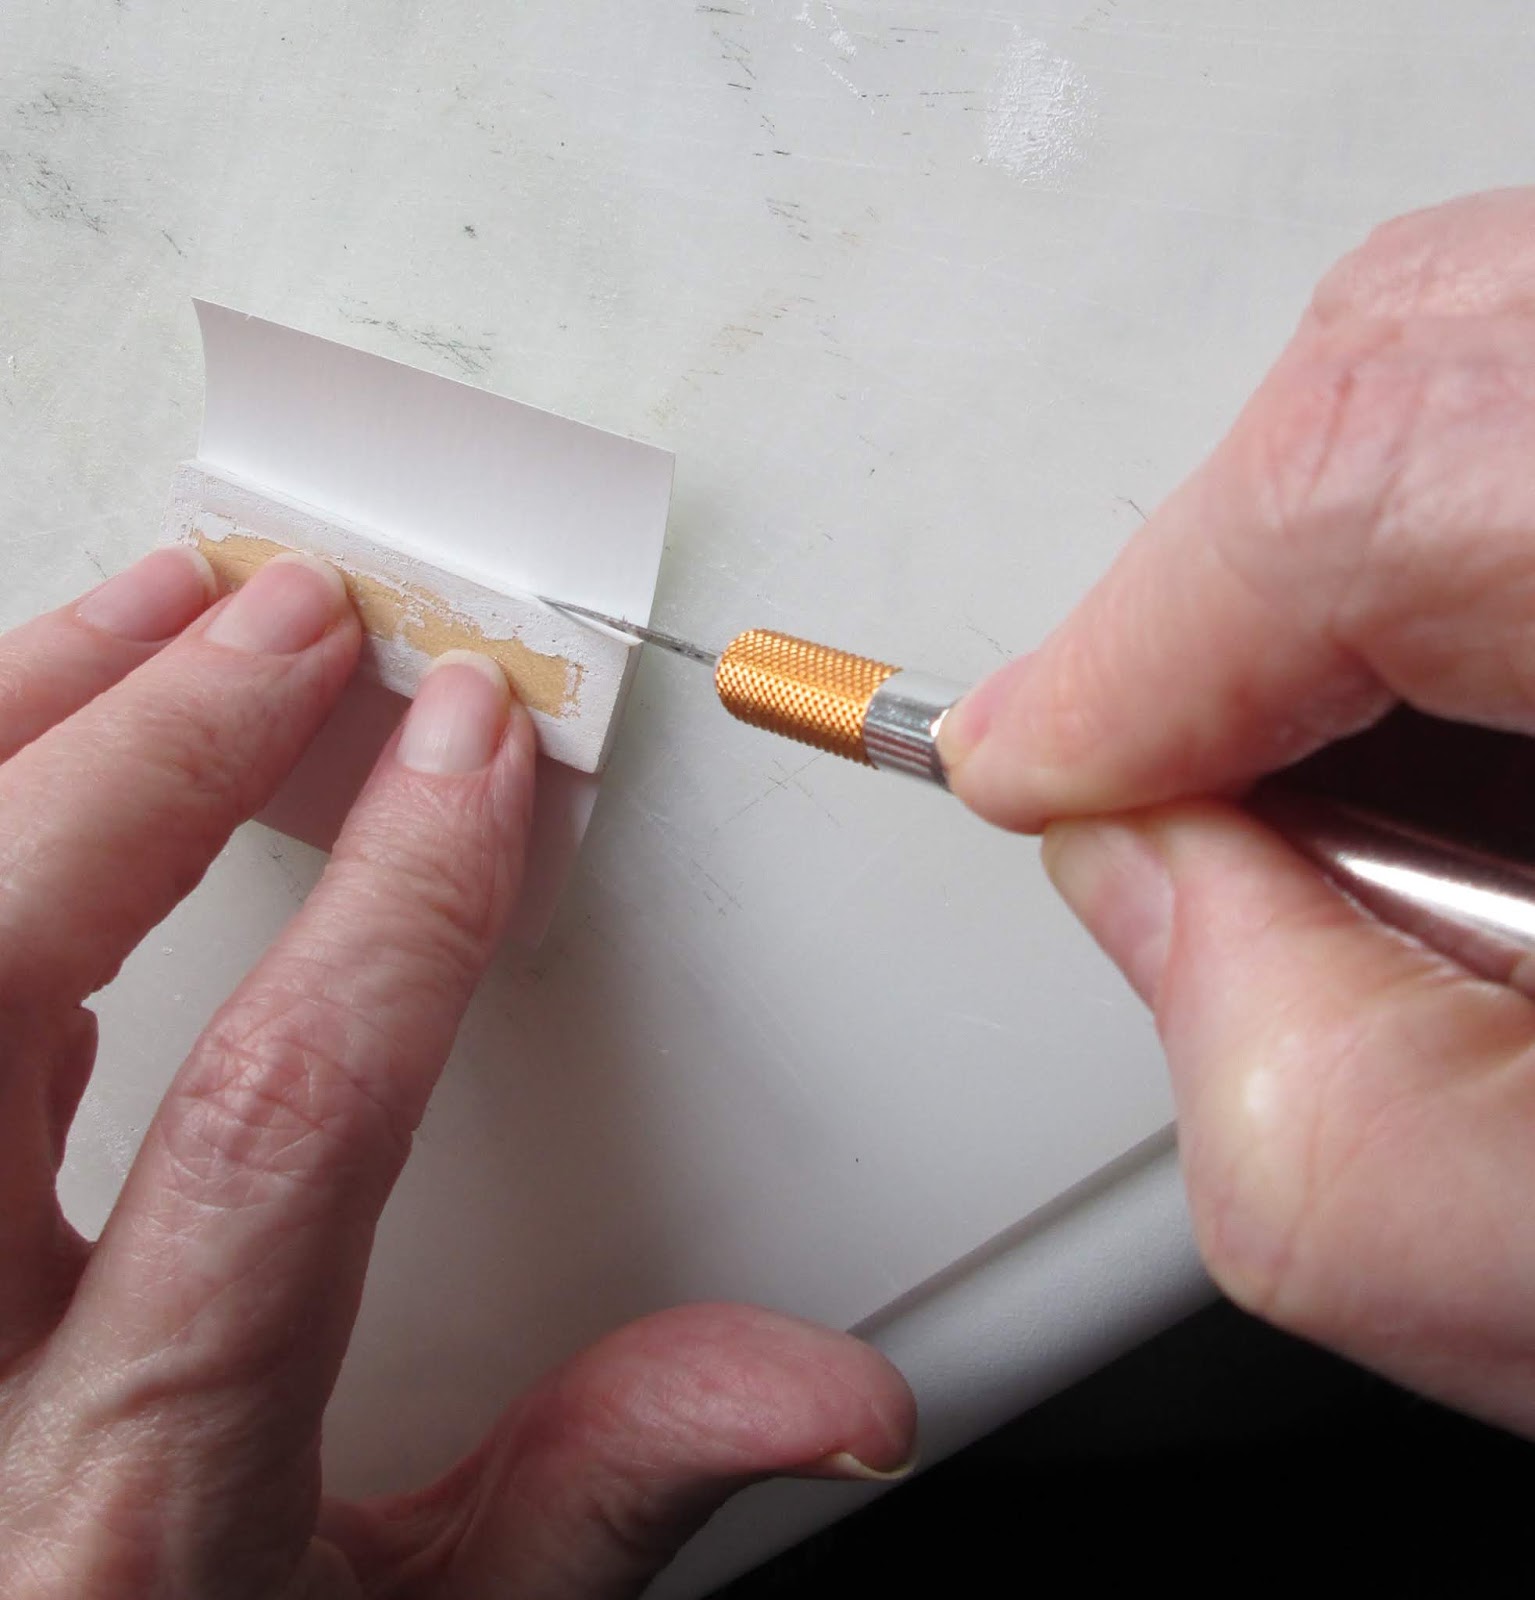
I then lay it down and firmly score a line along its first folded edge. You don't have to do this but you will find that when you wrap it round, however firmly you press it in place, you will get rounded edges rather than sharp squared off ones. Scoring the line is not an exact science and you may want to practice on your cut off waste pieces first until you know how much pressure to apply - too much and you may cut through the plastic, too little and you wan't make any impact.
Fold over very, very firmly pressing along the outer edge and side

Do the same scoring along the next fold you will want to make to complete the edges.

Cut off the excess material. These are the drawers and you need enough folded over to grip to the back of the piece but leaving as much wood exposed as possible to ensure a good area for gluing the drawer front to the wood behind.

When the piece is wrapped, work over all the surfaces with something clean and very smooth - this is the handle of my Xacto knife. press down firmly and check everything is smooth.


You should end up with nice neat, sharp edges.

I recently wrote a post saying I only use three glues.... BUT..... I had forgotten this one. It does what it says - glues and glazes - so in the main I use it for sticking in the window glazing because, worst case scenario, any glue which could be seen dries clear and is therefore nigh on invisible. BUT it is also useful for gluing plastic of any sort to any other material. PVA never seems to be a firm and permanent fix for that - it leaves flexible joins. This sets up just fine. Again I am certain its a PVA base but it does smell different so I assume it has something else added. Hope so at that price. This will enable the Fablon areas to stick to each other and will also stick any Fablon areas to any wood sections if needed.

All pieces prepped I often lay them out in some sort of logical pattern to ensure I am attaching the right pieces to the right pieces. I always do a dry fit before I start anything and sometimes write on each piece where it goes.
From the top - the lovely ready made plastic wall panel. There was a huge panic moment when it arrived, the cut edges and the grooves looked as though they had loads of 'debris' remaining from the cutting and even the surface itself looked a bit scuffed up - I was astonished as ELF is so meticulous. Thank heavens before I did anything about it, it suddenly occurred to me it might have a protective film over it ... which, of course, it did. Peeled that off and, eh voila, a lovely piece of kit.
Next down is the Fablon covered top, then plain wood back, then two Fablon covered side panels, four Fablon covered drawers, the plain wood front that the drawers are stuck on and the bottom.

As you assemble make sure you check every piece and think which bits will be facing you when you look at your house - make sure you choose the best finished pieces to face you. I am looking at the eight painted end edges on the drawers here to find the best ones as I will be viewing the media stand from the side and two of them will show.

All the Eazy kits go together in the same way - build a box from five pieces, add a top, making sure it is flush with the back and centered side to side properly. It looks like a large overhang at the front but the drawers need to be glued in place and they use some of that space.

There is a bottom piece which raises the stand a little off the floor. I was hoping for some short metal legs but don't think Elizabeth has any. Just in case something does turn up I have just used double sided sticky tape to attach the the fillet to the base in case I want to remove it. I will also put the media backing piece on the wall with mini-wax for the same reason.

 |
| with small stand in place |
This shows the film that you need to peel off both sides of the resin wallboard.

Finally ....... all done.

I love making these kits.
Erratum: I cannot believe I did this; I wrapped the drawers on the unit the wrong way round. I added the Fablon, wrapping the wood lengthways, covering the tops and bottom edges of the drawers, whereas they are meant to be wrapped side to side, so you have a nice finished edge where it shows. I did a whole kitchen the right way and then somehow forgot when I got to this! Apologies to ELF ..... so much for demonstrating my prowess with your kits.
Thanks for the great tutorial!
ReplyDeleteYou are very welcome. I hope it is some use to you. The ELF miniature kits are very good and she will make bespoke items too for a good price.
DeleteHello Marilyn,
ReplyDeleteThe splash-back is perfect for that kitchen and looks beautiful. Terrific job on the entertainment unit. It looks wonderful and very well made.
Big hug
Giac
You are always so supportive, thank you. Lovely to be able to share with folk who are interested in minis.
DeleteYou did a bang up job on covering your t.v. unit Marilyn!
ReplyDeleteIt looks just like a 1:1 lacquered unit that one would find at Ikea :D
Thank you Elizabeth. Not such a bang up job. Just had a note from the 'other' Elizabeth at ELF and she noticed I had boobed.... I wrapped the drawers top to bottom instead of side to side .... I will add a footnote to the post soon. What a twerp I am having done a whole kitchen the right way!! I blame it on my dotage.
DeleteIt's so good to see you back working with the minis again Marilyn. Also, an excellent walk through on the kit assembly. They're lovely pieces and fit right in.
ReplyDeleteThanks Irene, it is good to be back even if it is a bit hit and miss rather than the weekly rhythm I used to have set up. Between 'bad days' and a visiting toddler I don't get the long stretches of time which I used for my minis before being up here.
DeleteWow Marilyn that kitchen is a stunner and the new stainless backsplash was the perfect finishing touch! I've had a sheet of that Fablon sitting here intimidating me since 2015 when I did the Alki Point kitchen, the cabinets of which I ended up painting because I was so afraid I'd mess up! Thanks to your for your wonderful direction and detailed photos I may just be brave enough to take a stab at it in a future project!
ReplyDeleteI love how the entertainment center and tele came out! I am excited to see it in that light and beautiful room and wished I'd ever had the opportunity to rent a flat as lovely as you've created for your student!
Hi Jodi,
DeleteI totally get the nervy thing about fablon covering stuff in this scale. I decided not to risk it on the first kicthen I did years ago and ended up doing four coats of paint ..... and all the rubbing down between coats..... on a fair size kitchen. Very nice finish, but phew! So this time time I knew I wanted glossy and decided to give it a go and it really was just fine and a good end result. The big key to success is prepping well by basecoating with paint and rubbing down to the silkiest finish you can get and being spotlessly clean and working in a clean area... the tiniest bit of dust shows up as a bump at 1/12th. Especially with all that shine.
As for the flat; certainly not your usual slug-ridden student pit, but this is only let out to the occasional favoured PhD student by the very wealthy houseowner/lecturer who has a housekeeper and cleaner so we are inhabiting my ideal world as opposed to the real one. 🤗. Isn't that what we love about minis.
A beautiful kit and a fantastic result.
ReplyDeleteAah, thank you. Would have been better if I had covered the drawers properly. So annoying being that stupid. Hey ho. Marilyn
DeleteHi Marilyn. The benchtops and cabinets are just amazing. That fablon stuff is so smooth - or maybe it’s the way you applied it so neatly. And dang about the drawers.... we all do those things.
ReplyDeleteDang indeed! Not a big deal but I hate being stupid. All the 'amazing' is pretty much down to ELF miniatures - they make it easy to look good. Marilyn
DeleteWow! Looks wonderful! You're becoming an Elf kit expert.
ReplyDeleteTell me about it. I have had ELF in every project I have done. I knew I wanted two small kitchens for this one (in the loft and the basement) but then I used ELF for pretty much everything in the Hive (workroom) and the Rec room, a table in the sitting room on the middle floor and pretty much everything in the bedroom and sitting room on the loft level - oh, and yes, the two kitchens as planned! So every room other than the music room in this house has been ELFed. Marilyn
Delete