Tuesday, 5 April 2016

Miniatura, NEC, Birmingham 2nd & 3rd April 2016

This is a shoe-in between my weekly Saturday posts.  I wondered if anyone wanted to see what I bought at Miniatura at the weekend.  If you want to read about the show you need to go over to my Dolls House Trips and Shows blog.  Just click on the name.

OK thirty photos are about to follow so you may not want to do this .........

The first bunch are from Delph as you will see and all pretty self explanatory as to what they are and where they will go.


Delph Miniatures
 Managed to buy this radiator and a fireplace for the same spot - so one is redundant


Delph Miniatures
 Fire for the loft apartment - hope to light it in some way???


Delph Miniatures
 These ring binders actually have rings in them.  Sadly I shall probably cram them with paper.


Delph Miniatures
 Finally Elizabeth can sit down - it swivels


Delph Miniatures
 Need a couple more of these phones for around the house


Delph Miniatures

Delph Miniatures

a bag of rubbish - Delph Miniatures
 J & A Supplies is a go-to-place at every show for the practical stuff - only had a big tin


J & A Supplies
 My other always-get-something-from is Jennifers of Walsall. I have bought a ton of stuff online from them for this project as I know all their products pretty well, but it is always a good feeling not to pay delivery.  

So I got tiles for the mud room splashback - some may also find their way to the loft bathroom.  


Jennifers of Walsall
 Two lovely little boxes I owned once (before I got rid of all my 12ths).  I need a few bits of silver but can't afford the real stuff.  The flute is step one in the music room imaginings.


Jennifers of Walsall
 Romney Miniatures often has handy bits and bobs.  I have done two or three concealed lights so far in this house and have had to clobber proper lights for the bulbs - so now I have two ready and waiting.  I could kick myself because I didn't buy their teeny very strong magnets for my doors - it would have been worth a go.  Made a note for the next show.


Romney Miniatures
 Apologies to whoever sold me this, I have forgotten their name.  Searching the catalogue didn't help me.  They had all sorts on their counter including some plaster work - I was looking for a very simple rose for the hall and this beat Sue Cook and Miniature Mansions' fancy ones and cost only £1.50.


sorry I forgot! 
 I always stop by Mini McGregor to see what she has invented this time - still not got over the opening matchbox of previous shows.  I know I will be berated for not making these myself but it is oh so much easier buying them than sourcing the right bead, paper, free printie or whatever and they are inexpensive.  I have made them in the past if that lets me off a little.


Mini McGregor

Mini McGregor

Mini McGregor

Mini McGregor

Mini McGregor
 The following items are from Miniature Mansions and were actually on my shopping list.  They are resin rather than plaster which makes them easier to work with - coat of paint and you won't know the difference.  Sadly I think I have a fireplace too many!


Miniature Mansions

Miniature Mansions

Miniature Mansions
 Wing and prayer for this idea - I want to make cupboards either side of the fireplace in the dining room and I thought an arched front would look nice.  I have no idea how to do that but decided I would buy the trims to make me commit..

Here are the 'legs'......
Miniature Mansions
 ..... and here are the tops
Miniature Mansions
 Also got a rose for the dining room


Miniature Mansions
 I adore Maria's Fabrics - masses of choice - all well picked by her for their quality of cotton or silk and all in scale - even some patterns small enough for 48ths.  These are all silk and all cost £1.70 each.


Maria's Fabrics
 Glasscraft is always irresistible to me - so more glass for the collection.


Glasscraft
 Practical items again - enough oversize tiles to allow me to finish the roof now.


Staceys Miniature Masonry

 More from Phoenix for the pretend silver collection


Phoenix Models
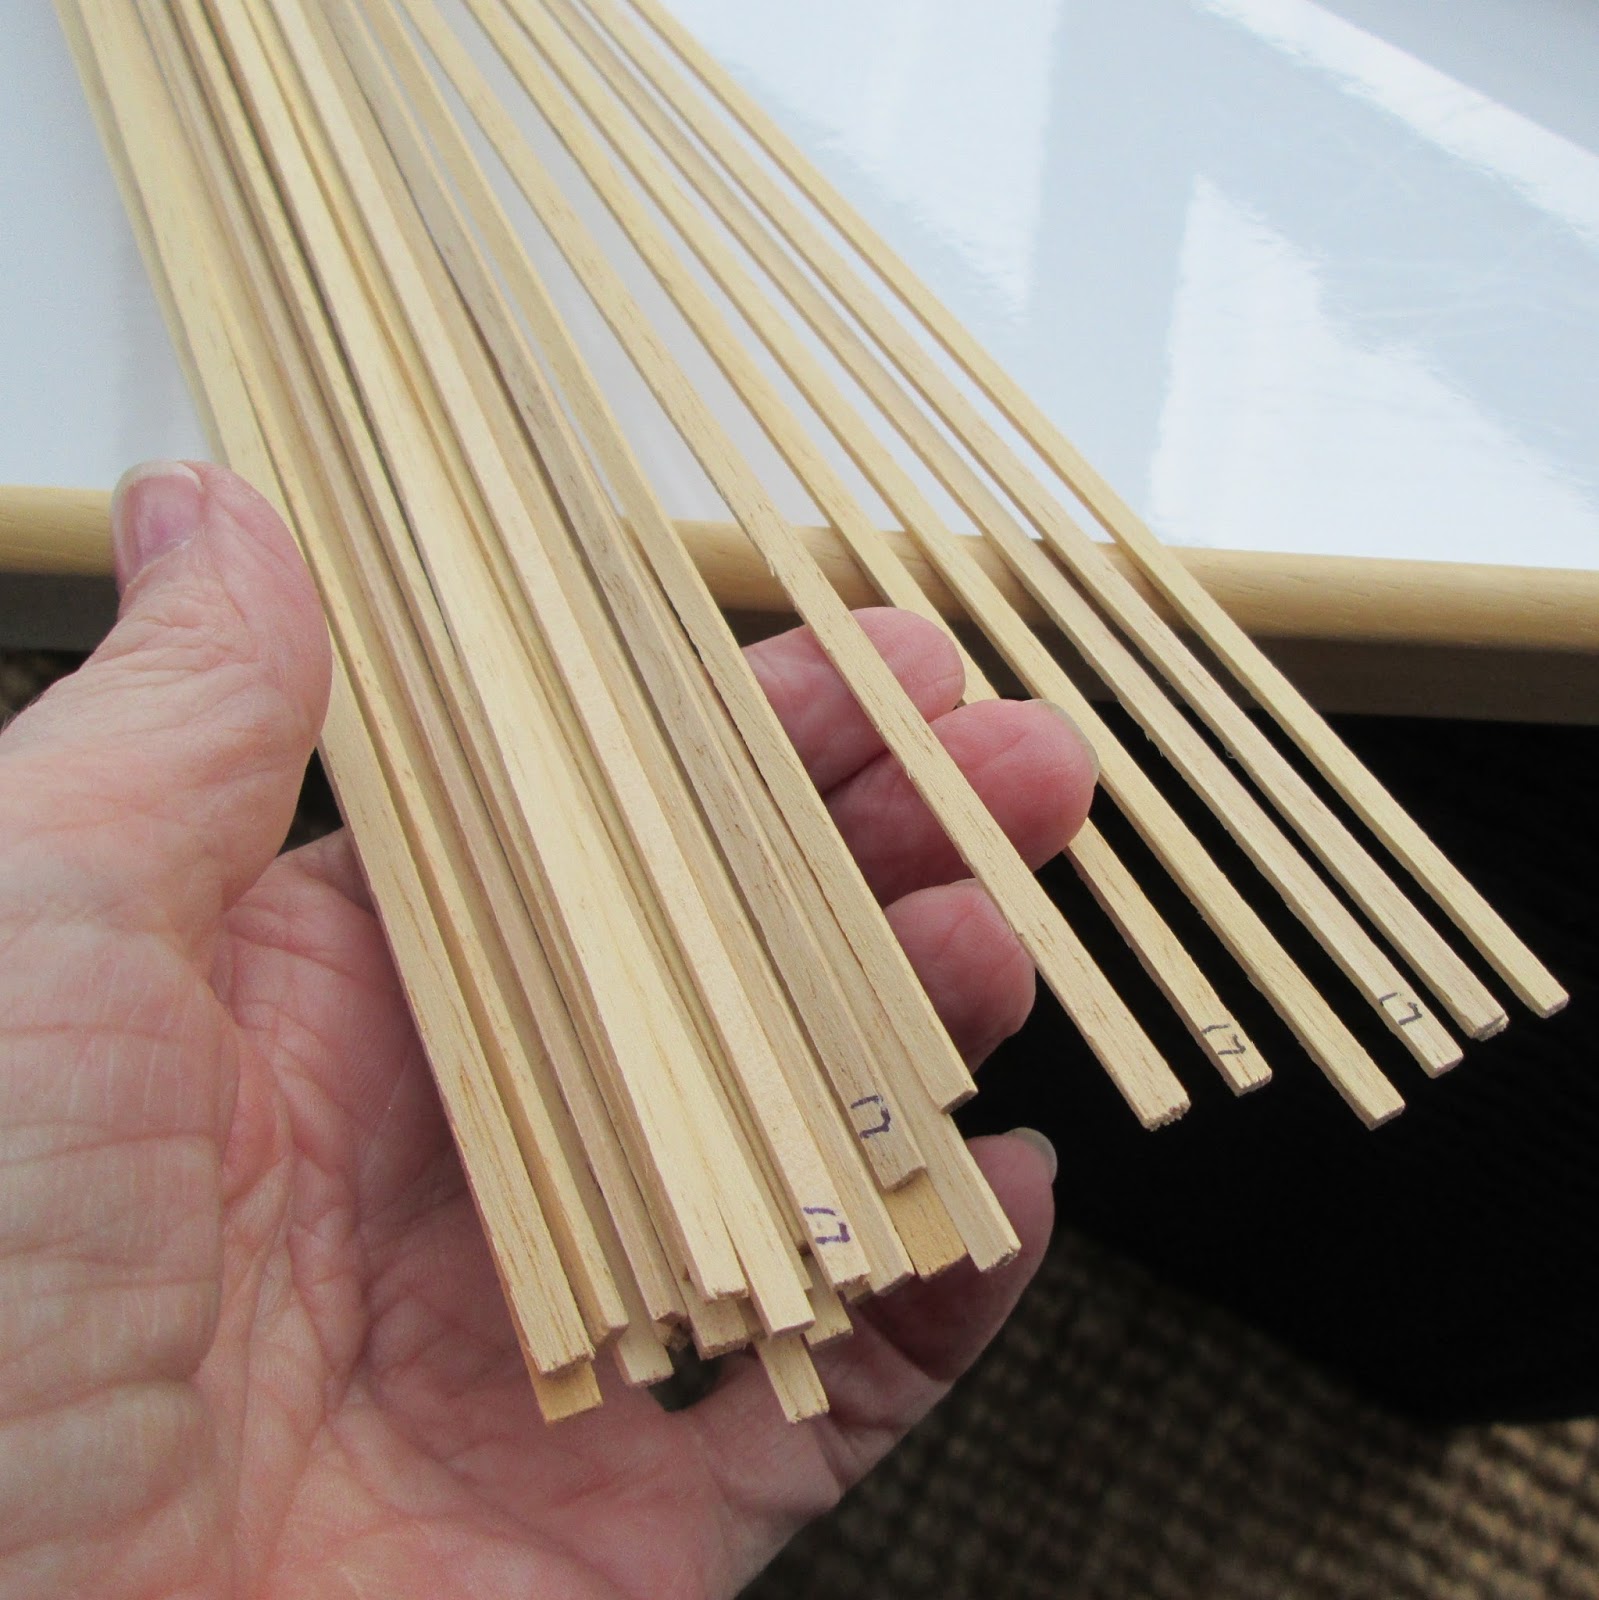
J & A Supplies again.  I wanted strips of wood to make window frames to cover the glass inside the house so it is more realistically sandwiched between wood.  Not precisely the right thickness or width but hoping it is so close I can get away with it.  Very long time before I know that.  I had to sort out 32 of these (forty-eight feet).


J & A supplies
 If you get a chance check out this place for whitewood furniture.  It is lovely scale, beautifully made and in a very thin and fine grain wood so it finishes beautifully.  They are made by the vendor, not just 'imports'.  You would think this was the simplest of tables and be surprised when I tell you how hard it was to find a simple wooden table with plain legs nicely finished for the Rec Room.


World of My Own Rob Lucas

Bravo if you made it to here.  I am now saving up for the next show.

Saturday, 2 April 2016

Headers and stretchers


Brickwork


THE GEORGIAN PERIOD 1714-1830

The late 17th and early 18th centuries were a high point in the use of brick. Their manufacture was much improved, with blended clay, better moulding and more even firing which lead to greater consistency in shape and size. The colours of bricks changed in popularity from red, purple or grey bricks fashionable in the late 17th century until 1730, when brownish or pinkish grey stocks replaced the hot colours. These were followed in the mid 18th century by grey stocks, and, by 1800, the production of yellow marl or malm London stocks, which were closer to the stone colour desired for a classical facade.

Brickwork was generally of a very high standard, in mainly Flemish bond although header bond was also popular in the early 18th century.

Pointing was executed to a similar standard. As well as giving more protection to the weaker bedding mortar, fine detailing also helped to minimise the visual impact of the joints so that the classical details could be displayed more clearly. 'Tuck' pointing was the ultimate development in this quest.

A more expensive solution was to use 'gauged' brickwork popularised by Wren using a facade of fine, colour-matched bricks cut and rubbed to exact units, and laid in thin lime putty joints. However after 1730 this was considered too expensive and was reserved for window arches, aprons and other ornamentation only.


The Building Conservation Directory, 1993


Me, being me, fancied having a go at Flemish bond even though I know it increases the four thousand bricks I need to stick on by another third!  It isn't about pedantry and being a stickler for accuracy, if it were that I really would have to do a heap more 'modelling', I just wanted to give it a more interesting facade......  and....... OK then, I wanted it to be a bit more authentic.


Post script written several days later:  I am back to doing good old bog-standard running bond now I have actually started.  I came to the decision that no-one will ever notice or care and I would be doubling the work and frustration - so, yes, lazy kicked in.  Too late now to switch back to plan A as I am underway.

When I came back to this to finish off this post I decided to leave in the original bit about how you should do a Georgian house just in case you are doing one and are less lazy than me.

Here are a couple of pointers for anyone using Richard Stacey versi-bricks.

three at a time


Any PVA glue will do.  I am trying to use up some of the tons of Aleens Tacky glue that I seem to have acquired.  Ideally it is best if you butter one brick at a time on its back and press it in place.  That way you won't end up with shiny glue glinting between your bricks.  In truth though I often lay down enough glue for three or four bricks on the wall and then quickly apply the bricks before the glue goes off.  I then clean out the mortar joints with a toothpick as I go along.

simple kit needed


You will need a small amount of glue at a time.  I put mine on a glass tile.  Any tile will do and it will always clean up back to spanking new after a bit of a soak in warm water.  I have had this one four years and it has had every glue under the sun on it including superglue and all kinds of paints and finishes and they all come off just fine.  It is a glass tile from B & Q and might be a better choice than just a glazed one, but I doubt it would matter much.  

I put a little on the tile; it dries up quickly so if you put out a load you will be wasting a lot before you can use it.  I apply it with a toothpick but use whatever suits you - you can see a glue spreader in this photo and I might use that now and then.  There's also a small pair of sharp scissors to cut any bricks to make them fit and some pointy tweezers in case I have any really tiny fiddly bits to handle. 

A clean toothpick is also good for cleaning out the mortar joints if you are fussy like me.  I even use a dental pick for that sometimes.  

Choose your weapons.

wrapped edges

On this build I am wrapping the bricks around the inner edge of the door.  As I said in an earlier post I have a 3/16 inch gap so there is room and it gives a good finish.  I am not doing this on the hinge edge, of course, as it has quoins. (Pronounced 'coins' incidentally)   Notice the good match between the paint and the bricks.

The only real challenge you will have is keeping the bricks on a straight line.  The first time I did it I carefully measured the space that four rows took up and then ruled the whole board with lines so I could do four rows at a time and know they were straight.  It never really worked as I hardly every managed to 'hit' the lines smack on.  I did, however, realise that the lines kept me 'steady'.  

On my next build I just ruled lines, a ruler width apart, and used them as visual guides to keep me on the straight and narrow.  This worked very well.  The only downside was that sometimes the pencil lines showed through the gaps too much.  

checking the vertical


An occasional check on the vertical lines is good too.  It is easy to wander slightly to your left or right.  Up until now I have just put a ruler down occasionally to see how the lines are running.

grid system


This time I have moved on to a pencilled in 'grid' to help me to keep checking my verticals and horizontals.  I will also try to rub out any lines that remain after the bricks go on.

last way to keep on line
Finally, to make sure I can keep to the same spaces when I am working in broken up areas, I lay down a vertical row of single bricks.  I note where the first lot end up in relation to the horizontal guidelines, then I go across the board (between the windows for example) and do the same single guide row in each place and make it land on the same horizontal line at the bottom as the first drop did. Then, after I have filled in the cut up areas, I should arrive at the same place at the bottom right the way across (the line under the windows).  I can then do a single line right the way across under all those areas.

All this makes it sound very complicated - I promise you it isn't when you come to do it.

The bricks should have 1mm gap between them and I used the edge of an old credit card to get a uniform gap the first time I used them, but now I just do it by eye.  Real brickwork isn't that perfect by a long shot.

I have made a couple of videos (click on the link at the left of this post) if that helps you more.


Saturday, 26 March 2016

Much consideration

A lot of thought needs to be given to the kit you choose to work with.  I know most of us are immediately constrained by style, price, size before we even begin.  After that if you then have the choices whittled down to more than one.... consider this....

How fussy are you going to be about it when it is built?

Doing a straightforward build and painting the exterior and letting it be a dolls house won't make too many demands whatever kit you choose.  The second you cross over into 'I want this or that to look 'realistic', the problems begin.

My first build was a Dolls House Emporium kit - the Wentworth.  It was super easy to do and I loved the finish.  Having said that I did kit-bash the basement, even on this novice build, to make it more compact


nice neat trim covering the door join


My second project was a Lyddington Shop from Bromley Crafts and it also went together without problems and, again, I loved the end result.  


and again the use of quoins to cover the gap


My third project was a complete remake of an O'Rourkes Post Office which would have originally come from Dolls House Emporium.  This offered a different set of challenges as it was already built and I had to 'unmake' it first.


this had a single opening front


This current Dalton House is from Dolls House Direct and I have found a lot of small niggly issues as I have gone along.  To be fair to the maker it may very well be just as good as its predecessors and the problems are arising because because my needs and expectations have increased ten-fold. The house in this photo is built by the maker and was all I had to go on when choosing the house.


for starters I hadn't thought about the join at the front


So, this is why I am cautioning you to think carefully about what you want to achieve with your project and to find a build that will allow you to do that.

I think the quality of the finish on this house, such as the windows and trims etc, is what a reasonable person would expect to find at the price I paid but they do require more work than the other makes I mentioned.

The construction is not as easy as the others and I found I couldn't do a dry run which I have always done and would want to do to give me thinking time about what room will be what.  It also allows for some decorating in the flat state before construction.  This house won't stand up without gluing and pinning; mostly because it has a ply back pinned on, rather than an MDF grooved back supporting the floors. I am not comfortable with having to 'nail' things together as it isn't always easy to make sure the nail goes into the material accurately.  It is only too easy to have a pin coming through and showing.  Also the pin heads show - not so important on the back but I am not fond of them at the sides.

This house doesn't allow enough space for a set of stairs down into the area and a servant's door into the basement from there.  Someone will have to climb through the windows to keep the area clean.  It does actually happen with a few houses in real life but I would have liked a servants' entrance and I hadn't realised that it wasn't possible to construct that because the the height under the stairs isn't enough. 

Right now working on the front of the house I am fidgeting with things like a 3/16 inch gap between the two doors when they are closed and the windows in the right side being nearly 3/16 inch lower than the windows on the left side.  This has a knock on effect to the horizontal stone trims (for a perfectionist)


click to enlarge and see if you can see the issues

There were also several problems to solve to get the doorway to look 'real'.  This included having to make an extra step and shimming up the door when putting it in its cut- out space to ensure the pilasters had a proper contact with the ground.


a shaped shim added
As I said at the beginning of this post - absolutely none of this will matter for most people messing around with this hobby and I am in no way decrying the maker - they make for most people.  However, if you are pernickity and want to create a fairly realistic house it would be best to be able to see a fully constructed kit if you can rather than depend on photos.  While you are there, take lots of photos and lots and lots of measurements then and go away and have a long hard think about which house will work best for you.

All this assumes you want a kit.  Many people buy ready built or even commission houses. For me, building is probably the part of the journey I like best.  I am not really a collector as such.  Ironically, solving the sort of problems I have just outlined might also be something I actually like doing!

Sunday, 20 March 2016

Brief note

If any of you follow the narrative part of this hobby I have just been back in to the pages at the top of the blog and tweaked the rooms pages and the narrative and the inhabitants.

Basically my main protagonist now has a PhD in Eng Lit rather than old bones and they all live in Cambridge rather than Lyme Regis.  

The earlier incarnation was because the whole (original) story came from buying one piece of mini furniture - a display case of fossils - that set me off wanting to create the Mary Anning story or, at least the Philpot sisters in their house.

I have clung to that display case but it doesn't work for me - this house has much of my alter ego in it and bits of my history so it would be nice to have it closer to my 'dream' me.  My Elizabeth now has followed the path I would have liked.

Saturday, 19 March 2016

Trims added

I have got the trims added ready to start the bricks.


This trim was a slightly warped very thick piece of wood so it needed to be clamped on while the glue dried overnight.  I apply my favourite Deluxe glue that I keep mentioning (R/C Modellers Craft Glue) and let it set up a little - just a couple of seconds.  While that's happening I add a few drops of Superglue Gel (only use the gel sort, not the ordinary Superglue, this way you have control of the stuff).  Superglue pulls the surfaces together quickly so they are in good contact while the rest of the glue dries.


The doorway and the basement areas are not fixed and won't be until the bricks are finished.  I have also added a further much narrower trim across the house walls at ground floor level.


The door was a pig to do.  I had a horrible time just painting it.  I tried gloss acrylic - too shiny!  I tried silk acrylic - too matt!  In the end after three coats of messing about and rubbing down in between I applied a silk water based (B & Q) varnish over the remaining black paint which seems about right.  Sounds like a Goldilocks story.

You probably figured this is the outside as it has a door-knocker.  It also has the traditional large Georgian centre knob and a 'modern' Yale lock.  It may never have a letterbox - some listed buildings aren't allowed them as the original would not have had one.  I may get tempted if I see a nice one though.  It needs to have a back flap for the inside of the door (draught stopper)otherwise I will have to cut a hole through. 


On the inside there is the reverse of the Yale lock and, instead of a large bolt, it has a modern version of the traditional Georgian door lock.  This is locked at night.  Both locks have the other halves of the locks to go in the door trim when it is applied. The large deadlock will have a keyhole on the outside of the door when I can find a suitable escutcheon.


This is a 'shim' which was needed to get the door to fit properly.  Not as simple as just a strip of wood.  There was much filing and scribing and shaping to fill the gap.

Saturday, 12 March 2016

Painting

Apologies for this week's post being late - now Monday and should have posted on Saturday.  Just spotted it was still in the draft box - woops!!

There is always a fair bit of painting to do in this hobby one way or another.  Here is the next lot needed to complete the front opening.


This shows the camouflage effect that I like to do for the mortar under the brick so I don't get a single dominant colour showing between the bricks.  You can get the 'mucky' colours just by mixing up any old bits of paint you don't want - the more you add the muddier it gets.


The roof was painted grey to go under the 'slate' roof tiles.  I also paint the edges of the roof panel grey.  Again this grey came from mixing two or three dark coloured paints.


The doorway is mostly stonework painted with my home-made mortar paint (sand added to any colour you fancy).  I do knock off some of the obvious sand when the paint is bone dry.  the trim round the door is painted white. I used Cuprinol Shades here.  It goes on thinly and gives a flattish sort of gloss finish.  It is a real world paint which is sold for outside wood use so it should wear well!  It also comes in a lovely range of colours.


Here's a closer look at the masonry paint finish.  if there are too many 'bobbles' for you, when it is dry just rub them off and you end up with a nice in-scale masonry finish.


The edges of the main doors need painting.  I have chosen to do them with the brick coloured paint I have used on the sides.  Always smooth the edges of the doors before you paint them with a fine grade
 sanding block or fine sandpaper.  It is 'end grain' so it will soak up the paint like a sponge.  You can put a priming coat on or a coat of sealant.  Personally I reckon if you are willing to paint it twice like that, you may as well just put on two coats of the paint you've chosen for the edges


.

The inside walls then need masking tape on them before you paint the edge of the wood, so you don't end up with a stack of 'sputters' to deal with when you come to decorate the inside of the house front.  It also lets you paint a lot faster as you don't need to be super careful.


This is what the first coat of the edge painting looks like.  The colour which matches the bricks brilliantly is called Polo Pony by Valspar (B & Q and others).  They will mix you a sample pot.  It looks hellishly orange but I assure you it is a good match.


Same colour on the sides of the building.  There is no logic to applying bricks there.  It is a huge area (times two) and would take masses of bricks, time and money.  This is a terrace so technically we are simply looking at a crude slice between two buildings.  It doesn't warrant bricks.

The magazine pages are taped down to protect the top of the trolley as the house was too heavy for me to lift and put on paper.

Incidentally, if you do want buy this house from DHD, these walls have a window on each floor - I got them to cut mine without as I want fireplaces there.  

Saturday, 5 March 2016

Paving and steps

I decided to make my life simple and just grey paint any pavement or step areas as I could not figure out a way to finish them without adding weight.  The versi bricks and slates are great and there is some flooring in the range but not grey versi paving stones.  Richard Stacey sells lovely real stone slabs but, as I said, it would add weight to an already heavy front.

I painted all the 'grey' areas very carefully and beautifully and then came up with this wheeze which I think looks OK.  It would look even better if I could 'dirty' it up and add moss and the odd weed.  Not a talent I have.......... as yet........nothing stopping me doing it much later in my house's life when I have nothing else to do.  I wish someone would do a 'dirty-it-up' class.


ashlar stone paper

cut into individual slabs and trimmed to size


border adhesive

If I am sticking any papers on my house I always use border adhesive.  Any make will do.  To be honest I think it is just PVA glue but it does seem silkier somehow?  Whatever it is, it is very strong and will bond the heaviest paper to wood or painted wood. Think this one was the cheapest B & Q sell but I am not sure about that as I have had it a long time.


I think the steps and pavement look much better 'slabbed' than they did painted:


slabbed steps

Notice that the pediments either side of the door now stand on the step.  Imagine if I hadn't added the step how odd they would look just floating around, not to mention an accident waiting to happen every time you stepped out of the door.

pretty good pavement???

top slab and front edge are made with separate papers so I could get in a full width slab