Sunday, 31 May 2015

Background stuff

Often with many hobbies some time has to be spent on 'chores' like tidying and sorting your work room (tick!), selling off stuff you don't want (about to do this), sorting out stuff to give away (tick!) and improving the area you work in....


beware wet paint

 .............  this was my chore for today.

My other half added an MDF top to my wonderful Ikea trolley to fit this particular build before we went away and it just needed painting to match the rest of the trolley which I have finished doing today.  I did two coats of white emulsion to seal and undercoat the MDF and today I brushed on one coat of Quick Dry satin paint to finish it off.

I absolutely commend this Ikea piece of kit to you.  It comes in a zillion forms - basically a rectangular box (in many sizes) equally divided into open sections.  You can then buy a range of things to put in the 'holes' to suit what you need/want and you can add terrific sturdy easy moving wheels to any of its faces.  My trolley has four spaces, two left open and two fitted with the drawer kit, giving me four drawers.  So far it has been my workhorse for all my previous builds.  It seems to be just the right height for working on the rooms.  Being a trolley I can get to the back easily for wiring when I want to or move it out for painting etc.   I even move it just to catch daylight when I take photos, which shows just how easily manoeuvrable it is even when loaded with a large house.  

I had a nano panic moment when I realised this latest house build was actually too big for old faithful, but it was a simple solution to add a piece of MDF in the size I wanted and it is now hunky dory.


PS:  posted wobbly number 3 YouTube video today: Imagine some stairs

Saturday, 30 May 2015

A dose of history

The amount of research you do for a project obviously depends entirely on how accurate you want your house to be.  Adult dolls' houses will range from 'anything goes', with an approximate or mixed scale, objects from any period along with just about anything which takes your fancy, right through to a perfect replica of a house in a particular period - think Queen Mary's house, the Thorne rooms and their ilk.

If I had a bottomless pocket to buy in historical expertise and craftsmen, as did both the projects mentioned, that is truly what I would like to own.  As I don't have such a pocket I have to settle for much less.  On a scale of 1 - 10 in terms of historical accuracy, I'd like to think I was a 9.  In reality I might achieve a 7.  I do keep trying...

In that vein I read as much as I can early on in the project and try and get to see as many real buildings as possible for the date I am doing.  That said, if you are really fussy, don't be led astray by assuming the National Trust (and others) must have got it spot on.  I am often surprised how often they don't!  As with all historical research the best place to go is contemporary documents, paintings and prints.  I am sure most people reading this could care less and that is a good thing - we all engage in this hobby for a million different reasons and they are all equally valid - dollhousing doesn't have any rules.

So, having said I like to 'get it right' as much as I can, I have just spent part of my week in Edinburgh scrutinising 1820 and anything preceding it.  [I confess to 1820 beginning to look a bit wobbly following this visit, as I really would like to wheel in a kitchener range to the kitchen so that will nudge it forward to 1830.]

Here is a link to The Georgian House which is mostly about 1820.  I did take a mass of photos but they are all copyrighted to the NT so I cannot share them here without permission.  You are as well visiting this link as it will satisfy most queries you might have.

I also visited Gladstone's Land.  Again click on its name for a mass if images.  If you are working on the seventeenth century a building like this is wonderful.  It gives you a real sense of how many people lived and worked in the tiniest of spaces.  It is an utterly unusual building with a ton of history and if you can ever get to Edinburgh and the Royal Mile go and visit it.  If you want to see it recreated in 1/12th The Tenement is the Blog to see.  Wonderful work.


Gladstone's Land
In truth, my visit to it  was to see the Georgian room which was a later extension to the building.  it was very nicely done and confirmed a lot of what I was thinking about my modest house.

the extended back of Gladstone's Land

A couple of minutes away is the Museum of Childhood, again click on the name for an images link.  If you like all things toys and old this is five (?) floors of heaven and free entry!  Even better they allow you to take photos.

My absolutely favourite item was the butcher's shop dolls' house:

click to enlarge

Click on the photo here so you can see the detail.

I was also caught up in this prettiest of small houses - simply described as American...

do you recognise this

Are we looking at Bliss or Gottschalk and how old?  If you know what it is please let me and/or the museum know.

We finished up with a visit to Newhailles which, although something of a mish-mash of periods, has good strong Georgian bones.


the original country villa

The original house was built in 1686 but changed ownership in 1709 and was renamed New Hailes. 


the original villa plus two additional wings


A new wing was added to the right to house an incredibly huge library so sealing Newhailles' reputation as the hub of intellectual ideas. Dalrymple's son added the left wing later.  (again click the name if you want to see what's there)

The house is loaded with wonderful detail and if you are lucky enough to have Aileen as your tour guide you will have the most wonderful hour and a half's insight into a fascinating place.


Edinburgh is a truly lovely city.


Tuesday, 26 May 2015

Take a breather

I have been posting every day now since 21 April so maybe you are ready to take a break.

I am away for a week in Edinburgh so no physical work being done on Dalton House. Note I said 'physical'.... so I doubt I will be posting for a whole week or more.

During the week I hope to check out The Museum of Childhood as they have a dollshouse or two I think (!)  There is also a large model shop - Wonderland Models - which is probably no use for me for their dolls house materials but sometimes in model shops you come across useful stuff.

 I want to go round Gladstones Land.  This is actually too early for me - 16th century but I want to see it.

The definite 'hit' and main attraction will be Edinburgh's Georgian 'New Town and a tour of the Georgian House.  I have a huge list of things to check out in terms of fine detail.  Every time I get stuck on something I try to make a note of it so if I can get to a real place I can find the answer.  For example how did bell pulls 'appear' in a room - through a ceiling or wall? on a chain or a rod or invisible workings? .... and a ton of other questions.

Look out for a load of chatter and photos when I return.

Monday, 25 May 2015

Gems in small boxes

Today's package was from Minimum World.  It has taken a little longer to arrive than usual thanks to the post office.  I am telling you this to demonstrate how good Minimum World has been.  They emailed me yesterday to say the post office had returned my package as an invalid address!!!  I confirmed to them that they did indeed have my correct address and here it is at lunchtime today.  Brilliant. 

It was a pretty expensive little box because of these


Richard Stacey flags
They are Richard Stacey's flags.  They come with a two-sided finish - slate or sandstone and are random sizes to make an authentic looking random stone or slate floor.  They are £12.95 for 100 sq ins wherever you buy them.  this is the first time I haven't bought them from Stacey himself.  My thinking (and cheapskate bone in me) being that I would be paying postage for a couple of things I could only find here and then again on Stacey's flags.  If I bought them here I get free post (over £40).  So win, win.

candles

Caption says it all.  Useful though when you come across them for a nook somewhere.  The candles were usually under lock and key  in a house and in the the purview of the butler or housekeeper so these are not to be left scattered about the place.


to be 'bashed'

I knew this wasn't a particularly lovely item but I wanted the butterflies out of it for pinning or putting under a dome.  Not sure what yet.  Somewhere among my three Philpots one of them must have been interested in butterflies as well as curies.


door architrave corners

Just a bit of appropriate trim to add to the corners of architrave round doors - anything to get away from dead boring without going to the whole hog of exotic plaster trims.  Simple, modest house remember.


cranked hinge screws

Utterly practical and nit-picky.  The cranked hinges that came with the kit are brass but have nickel screws - I just know they would bug me!


So, many thanks Minimum World for an eclectic and, in the case of the corners, rare collection of bits and bobs and a great customer service approach.


Sunday, 24 May 2015

How not to paint

I already showed you the first coat of paint I did to help seal the MDF.  In all honesty it hasn't had a lot of effect.  This particular MDF still seems to be sucking up paint at a rate of knots.  I am wondering if there are different qualities of MDF - seems reasonable.

The previous three builds have all been fine with just a single coat and a rub down afterwards.  Paper and paint have gone on easily after that.

I was hoping to get away with the usual two coats on the ceilings, especially as I am painting inside a box which is no fun at all.  Here are the results of my efforts.


second coat going on

This is the second coat going on and it looks like a good coverage while it is still wet - you can see the thin band at the bottom which only has the first coat and it is quite a contrast to the second coat just applied above it.


drying out
As it dries out you can see it disappear into the MDF leaving a very patchy finish.  I am just living in hopes of a rub down and a third coat being the answer.

Tips to pass on from this experience are:

  • do your very best to paint as many surfaces as you can in their flat pack stage
  • use a roller
  • at least tip the house on its side for the ceilings if you must paint them after building (as I have done here)
I am not sure what to tell you about sealing the wood now as I am not confident the single coat of emulsion I have done has made a lot of difference.  We'll have to see as the decorating progresses.

Saturday, 23 May 2015

The not-Dremel

I have spent more than a month trying to decide what to buy in the way of rotary tools.  The thinking behind this urge is that I need to make quite a few grooves for wires for lighting and fires and they are relatively hard work to do manually.

For those of you not committing to powered help you can make them with a sharp knife, a v-shaped file, a lino cutter, a v-shaped chisel.  Most of you will have to buy the tool of your choice and by then you might feel you are already some way towards the cost of a (cheap) rotary tool?

I would also like it to be useful for making up furniture kits.  I think it might be overkill.  I am hoping I could do some sanding with it but the sanding drums are a very course grit.  I need to find out if they can be bought in super fine stuff.  I am also hoping it might do the tedious buffing after applying wax.

Dremel is the big name in the market but rumour has it the old ones were brilliant and are still being used thirty years on, which is how they got their name.  Then the manufacture went to the USA (???) and they were not good, now it has returned to Germany and Bosch (??) and they are good again.  I emphasise this is what I heard not what I know for fact.

That said they are also a wee bit too pricey for me.

I had a single speed kit when I was doing 1/12ths before and it worked fine other than being single speed which meant it was underpowered and cutting a groove took forever.  As it and all its tools cost me $10 I had my money's worth.  With that experience behind me I have splashed out £19.99 including postage and bought this from Amazon:


Xenta

163 things to play with

So far I have unpacked it, put all the loose bits and pieces back in place and run the tool to see how it feels and sounds.  So, yes, it didn't blow up or do anything nasty.  However, as always, these things are made for blokes and at that size and weight I probably need to buy a flexishaft attachment.

I emailed Xenta to see if they sold one - got an immediate reply (ten points in my book) they don't make one but they recommend a Dremel 225-01 Flex Shaft Attachment.  Seems a bit of a shame to pay as much again to Dremel for this as I paid for the motor piece and its 163 bits and bobs.  Hey ho, bite the bullet.

I then got narky in my head about the prospect of another elevenish pounds to buy a stand for the shaft but I think this elegant solution will suit me just fine.  Watch this space.

Inline images 1


Friday, 22 May 2015

Plan B

After all my wittering at you about making sure you know what you are doing and what you will need before tiling a floor - guess what - I got my tiles and laid them out and changed my mind.  It just goes to prove that when you think you have thought of everything you probably haven't.  

When I put the tiles in place on the hall floor, the tile 'rug' that I thought would work well - just didn't - it looked too small and drew your eye and so the hall floor looked ridiculously small.  It is only 8" x 12.75" any way so doesn't need shrinking any further.  I also thought all the doorways would look much better with a defined line across them rather than a plain cream tile.  This tile meets wood on the other side of each of the doors and needed something to underline that.  So, I have ended up with the simplest of all floors - a chequerboard pattern with a darker tile surround.


trial and (spot the) error

The border down each side is a half inch square tile, the border across the top is a one inch tile and the border across the bottom is a one inch tile from which I have to cut a quarter of an inch to make it fit the 12.75" length.  Here again is a planning issue; had I been thinking about tiles when I planned the inner walls, they could have been made to fit the tiles better.

The strange looking brown tiles are the (now extra) cream ones laid face down so I could work out how many pale grey I would need to complete the floor.  Thanks to Graham at Dollhouse-flooring.com I had them in a couple of days.

Here's how I cut them to fit.


G-clamp

Two really useful pieces of kit - a G-clamp and mitre box.  I know the clamp is technically upside down but it is fine for small work and is easier to undo and redo for each thing if that's what you will need to do as I eventually did with this.


the proper way

Here I am using a piece of wood clamped in place along with the mitre  block.  The wood is being used as a stop-place for the tile so I don't have to measure and mark off the quarter inch each time.  This works just fine.  Thanks Graham for the tip.


my way

Being me I just had to do it a different way.  I was having trouble holding the tile in place while I was cutting it so I marked the cut and then just clamped each tile along with the mitre box and cut through.  

By now I had done six of the eight.... I then discovered this!!


Aaaaarrrgh!!  so simple

Thursday, 21 May 2015

Video uploaded

I have uploaded my second, hand-held, wobbly video.  You can either click on the link over in the left hand column of this blog (My YouTube Videos) which will take you to all of them or click here if you only want this one:  02.  Inside Dalton House

Something to go on the floors

I am having a hard time finding large rugs for this build.  I still haven't got one (or two) for the 21" x 15" (53 x 38 cms) that is the drawing room.  Ideally I would like a large one for about two thirds of the room and a matching runner for the other third but right now I would settle for just about anything.

A fellow blogger pointed me in the direction of My Tiny World.  The name was familiar but not sure if I have ever shopped there.

So far, so good.... nice rugs, good price, fast service.


My Tiny World
One of the large ones is for the parlour and the other for the dining room.  The smaller rug and runner is just the right size for the library.

These are the ubiquitous Turkish woven rugs you see around but, as I said, in this case in a good size and of the right period.  I like the thickness of the material - some can be over fuzzy.  They look fine for a thick modern rug but not for nineteenth century carpets, some of which may have been around a lot longer, they need to be thin and flat.

These may well get the coffee stain treatment to calm the colours down a little and the fringes removed.  Maybe I could do what the Georgians spent hours of every day avoiding doing and leave them out in the sun to fade a little.

Reading the Susanna Whatman book, she is nigh on obsessed with the sun not touching any fabric or furniture in the house.  There was a precisely timed schedule for the housemaid to close blinds in various rooms in turn as the sun reached them.  Not as mad as it sounds if you were dealing with 'natural' dyes which change easily in light, natural fabrics such as cotton and silk which deteriorate with sunlight and polished furniture in high-priced wood.  Indeed all these things were of disproportionately high value compared to the things we own and they were generational not just meant to last five minutes until we wander round John Lewis or Ikea again.

My grandmother certainly adhered to the same constraints and my mother did too with the things she prized.

Wednesday, 20 May 2015

Floored

Clearly every time I get a parcel I am keen to recommend the vendor to you otherwise I wouldn't have ordered from them in the first place.

Here are my lovely hall tiles:


Dollhouse-Flooring.com

I mentioned these in an earlier post, talking about drawing up a plan and I said I would show them to you when they arrived.


Dollhouse-Flooring.com is another of my go-to vendors.  Lovely product at a good price and the very best service possible. The owner will help with design and calculating and just about anything else and is meticulous about making sure you have just what you want.

This the Marlike range that I really like.  They are a great replication for marble tiles - shiny but not glistening which I hate.  You need to 'flatten' everything slightly in miniature.  Colour and light needs miniaturising too otherwise everything just shouts at you.

They are a very thin laminate and are beautifully cut and can be stuck down with any acrylic glue.

In all my previous projects I just stick any flooring to card and use double sided sticky tape in case I need/want to remove the floor at a later date.  This time, as there is no hanging light below this floor I may just go for it and stick them straight to the floor.

After all my proselytising about drawing up a complete plan to be sure you know what you want before ordering, the first thing I did after taking this photo was to start messing around with putting the squares on the diagonal and wondering about a border around the edge of the room instead of the 'rug' area........

Tuesday, 19 May 2015

YouTube part two

In a previous post I mentioned I was starting (hopefully weekly) YouTube how-to videos (again) and directed you to the first one.  I have now added a link to my channel in the left-hand column of this blog so you can check them out any time as I bowl along, should you want to.  I promise they will get better.  Those of you who already know how to do this stuff chip in with comments here or email me if I am doing something wrong.  Please.  I am happy to learn and to pass it on.  Right now I am sharing all this via Blogger and YouTube for anyone who is just starting out.  I spent forever trying to find 'help' as a newbie so I hope some of them can find me and that it does help.

Brown paper packages tied up with string ......

There is an element to this hobby which I have never mentioned, or seen mentioned, that I thoroughly enjoy.  I love receiving all the various packages and parcels full of treasures to play with.  I have no idea why, other than the mere sight of a parcel touches the child in me and I love opening the box and (re) discovering my gifts to myself.

Today I received three parcels, this being the first one:


Jennifers of Walsall

The incredible Jennifer's of Walsall get the prize for the best packed, fastest delivery, consistently most reliable of anyone I ever buy from.  That's probably three prizes then! .... Oh, I forgot to mention really, really helpful.


I ordered these late on Monday 11th May and they arrived first thing Wednesday 13th!!!

Here we go:

black walnut floorboards

This is pretty much the only floor I use in my projects (where wooden floors can be used of course).  It is an American product (Houseworks) and is real wood.  This is their Black Walnut.  The wood is card thin, of the best quality, will take varnish or stain or wax or whatever you want to throw at it and, best of all the floorboard size is historically correct for several periods.


The strips are laid on a backing paper and all I do is add a thin layer of silk (water-base) varnish it to bring up the colours in the wood even more.  When its dry it is a simple job of using scissors to cut it to fit the space (make a template first).  I then lay it down using very thin double sided sticky tape so I could easily remove the floors if needed to get to a faulty light, for example.

I cannot see how this floor could be improved on.


Mini Mundus kit

I have made a couple of Mini Mundus kits in the past and they are lovely.  The wood is a reasonable quality so they take stain, paint etc really well.  I prefer kits to the usual furniture that I can afford as I don't like the finish on much of the stuff out there.  The lovely artisan quality pieces I see at shows get the patina and sheen perfectly, but they are well beyond my budget.  This way I have some control over the finish even if I can't do it as beautifully as them.

This little duo can go just about anywhere as they are candle tables.  They are two different shaped tops which is a nice touch.


Fire-mark

I am sure many of you know that still by 1820 and for a couple of centuries before there were no 'shared' fire services.  You could insure your property with a company who had a service in your area and if there was a fire they came out to you.  To enable them to recognise whose fires they should douse and who to ignore (!) your house would have a fire-mark like this displayed in a prominent position.

My house was probably built around 1750 so, clearly, the owners brought their 1710 fire-mark and policy with them when they moved.


Mini Mundus

This is both a cheap and an expensive way of getting 89 books for the library.

Obviously if I bought 89 pre-made books from someone like Dateman I would have to take out a second mortgage.  Equally, I could have paid much less than £22.95 if I had used one of the many free printies you can scout up on line and printed it up, using high quality photographic paper. (first buy some).   Added to this I would then need to find suitably thick wood for the books I have printed (in this case 4mm and  6mm) and then round off one edge to get the shape for the back of the book.  Being me I chose what I consider to be the middle path and here we are.

Mini Mundus

Another little duo from Mini Mundus waiting for my creative juices to flow.  I wanted both of these pieces for sure.  The sloping desk is for the Servant's Hall (just as in Downton!) and the steps are, obviously, for the library.


Streets Ahead (?)
These are three false doors for the back of the bedrooms in the attic.  It is again something I have used before and works very well where you don't want to bother cutting a hole for a door.


Streets Ahead
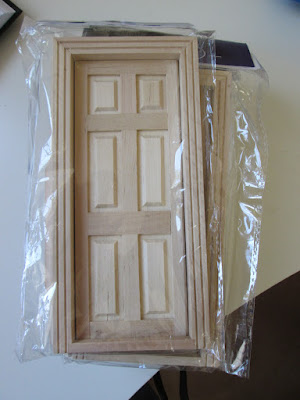
Eight of these fully fledged doors for around the house.  They will be kit-bashed as I want to add corners, maybe different architraves.  Generally I am not bothered about doors opening as they are often sideways on in most kits when viewed  so I always remove the bar across the bottom - nowhere in my real house does a door have a strip across the bottom....... so it doesn't happen in small world either.  Making them open without this bar doesn't seem doable right now - hinges I guess?


who makes this?

I don't know who makes this but it is the fairly usual plain pine (inexpensive) flooring that I use in attics or other 'poorer' areas of the house.  In 1820 it was commonplace to use cheap woods throughout a house for panelling and doors and was always painted.  It was also commonplace to paint poor quality floorboards.  Right now I am not sure if the attic rooms will be painted as they may well have been when they were used for the family or just be faded/scrubbed wood.

Writing about these floorboards reminds me - do try to get to a shop or show if you are buying any wood products for the first time - such as doors, trims, floorboards, white furniture.  The quality of wood can vary a lot.  In my time I have spent over thirty pounds on some trims from an EBay seller which were absolutely unusable as the wood was so coarse and open grained.  I bought a front door once because I liked the style and had the same problem, not to mention wonky.  Even pine boards that you see around look roughly the same as the ones here.  It is easy to get tempted to save a few pence per sheet but, again like me, it is a mistake you don't repeat.  If you can't get to a show or a shop then I suggest you only order one of something (with some other things to make the postage worthwhile) and see if its what you want before diving in for the rest.  Otherwise, just make your life easy and order it from Jennifer's of Walsall.


Monday, 18 May 2015

Trompe l'oeil... sort of....

I have been playing around with what you might glimpse through the hall door if it is open just a little and here's the current conclusions:


first idea

This is the photo that planted the seed - I had a picture of a hall and inner hall.  I t had been taken square on from the front; this is as rare as hen's teeth as it turned out.


I like the effect but there seem to be too many interior walls and the stairs seem too far back for such a small house.  I began a search for an alternative.  
current option

There wasn't a perfect alternative but this one seems close enough.  It does actually show a staircase going down from this landing on the left which lines up very nicely with where the one from the basement would be.  It doesn't give us much inner hall as such but at least the arrangement does cover the idea of shutting off the 'outside entrance' from the 'private' areas of the house.


better with light

Now that works just fine with a light coming up from downstairs - aka a small torch hidden round the corner.


Sunday, 17 May 2015

Tiling floors

No matter how simple the pattern on your tiled floor is I think it is best to draw it up first and then work out the materials you need.


a scribble - but mine own

It can be as scruffy and crude as this but it is reassuring to know you have got your requirements right before ordering.  Under-ordering is too annoying for words - you are part-way through the job and realise you are now going to have to wait for the new stuff to get to you (plus another postal charge).  Over-ordering is aggravating every time you look at that little box of leftover tiles.....  yes, I have done both.  With a little multiplication it seems easy to calculate the square inches required and order accordingly but, even on something as basic as this, there may unseen consideration.  In this case I hadn't thought out what I would need for the inner frame's corners. So, trust me, out with the old pencil and graph paper and be sure.

My floor tiles come from the very best of flooring vendors - no debate.  Great quality materials, wide choice of finishes, the most helpful of sellers, super-fast delivery - it simply cannot be beaten.  The link is here Dollhouse-flooring.com

I will show you them when they arrive in a couple of days.

Saturday, 16 May 2015

You Tube

I have started some YouTube records of the build if you want to take a look - they will appear less frequently than this Blog but sometimes it helps to have a film to show how to do something.  Right now that's not true as nothing much is happening.  That said, I have three of them in the bag.  This is the link to the first: Outside Dalton House.  The second one showing the inside will be 'published' next Saturday and the third showing the pretend stairs will be there the following Saturday.

I apologise for these being hand-held wobbly.  They will get better when I am actually working at my desk.  I did a few for the 1930's house and was getting the knack of it by the time I quit!

You can sign up on that link to be notified each time one comes out, just like you can for the blog.


What can I get in?

I set off wanting a really huge house particularly so I could have large rooms to go at.  I then reneged on this plan as I realised I probably couldn't ever afford to furnish it.  Needless to say, just as in real life, none of the rooms I now have are big enough for my dreams.

When I am planning how to 'cut up' the interior I sometimes draw rooms to scale and plan in furniture to scale.  This is really the very best idea and might stop you from chopping off the odd three inches - how can that smidgen matter? - and then discovering you now have an unworkable space.  It can be very hard to do though when you have no idea of how you might furnish somewhere so, more often than not in my case, it gets chopped around and  I then have to work with the space I have left myself.


testing furniture

I do like to mess around with stand-in furniture once I have the spaces ready to play with so I can try and get the feel of a room.  This is something of a struggle this time as I only have a few sticks of furniture - I shed the rest when I went over to the dark side (switched to 48ths).

This 'playing' is pretty much essential so that you can work out where the fireplaces will come in relation to furniture and where the lights will need to go.  

My dining room measures 13.5 x 15 inches which seems pretty generous until you need to get in a couple of sideboards, a chimney breast, table and six chairs with the option for eight.  Trust me, it really is a quart into a pint pot.  This exercise has left me with a fear of the other much smaller rooms in the house.  I just have to keep reminding myself we are dealing with a modest house in Lyme Regis, not a London mansion. 

Friday, 15 May 2015

Test, test and test

It is so very important to keep trying structures against other structures as you go along.  It is extremely unlikely if you kit-bash anything you will get away with not making some mistake but clearly you will want to avoid it if you can.

One of the biggest mistakes is moving interior walls without considering the windows.  Now you have read that, it will seem glaringly obvious, but I have seen several finished projects where someone didn't do this.  There is nothing more 'distracting' than seeing an interior wall divide a window when the house is closed up.  


marks showing position of windows
At the planning stage you need to do a lot of measuring of this and that and transferring those measurements to the 'box' part of the project to check the relationship of one thing to another.


right hand door in place to ensure the new walls are OK

When you think you are ready to glue in the walls do another 'dry build'.  Put them in without glue and stand the door fronts of the building in place and check that doorways and windows all make sense.

If, like mine, the front of your house also includes some sort of pavement or basement frontage that also needs to be thought about in relation to the interior of your house and what could and couldn't be accessed from where.

In my case for example there with be a 'dead' area under the entrance hall (middle floor in this picture) which I would like to access from the servant's hall as some sort of storage area.  You can see from this photo that the dead area which runs in line with the entrance hall walls is not neatly where I would like it to be.  In this instance that's fine and can be 'got round' but that may not have been the case.

The servant's hall (bottom floor in the picture) only gets one off-centre window which is also OK but, again, it could have looked odd in another room in the house.  All my other rooms have windows in an appropriate position.  So far, so good.

Thursday, 14 May 2015

Magic sponge

painter's sanding sponge

I discovered this magic sponge right at the beginning of my dolls house 'career' and I am so glad I did.

I mentioned in an earlier post that I am rubbish at painting but even if I weren't this is a very necessary object if you want a good finish on anything.  The first coat of any paint or varnish will 'bring up the wood', leaving little 'nibs' - basically the moisture sinks into the surface and a fine layer of wood fibres rise up from the surface.  Often is isn't particularly visible but if you run your fingers over it you will have no doubt about the surface being incredibly rough.  Putting more paint or varnish over this is a hide into nothing.  It will  never get better by trying to cover it, you have to rub it down.  I am avoiding the word sanding because it suggest a fairly rough abrasive.  The opposite is needed it must be as fine as you can get.  Indeed it can be done with scrumpled brown paper but is harder work than this sponge.  

If you buy a painter's sponge in the finest finish you can get it is just magical.  It will follow almost any contour.  It covers a good size area if you want to finish walls as I am currently doing.  It is covered on four of its six sides so you have a great ninety degree sanding area to get into corners and edges.  It is washable.  If I tell you this one is four years old and has been used on everything I have ever painted (and more), you can see how well they last.

I have just Googled it as I might treat myself to another and B & Q, its birthplace, doesn't seem to have them any more.

I found them, online, at Wickes for the princely sum of £2.49 but I am sure you can get them from other places if you don't have a Wickes nearby.

I did get excited by a little piece of material that I got with a Jane Harrop kit which does the same job.  It is called Abranet (click on the name if you want to know more).  It is lovely to handle and it did a fabulous job on the small kit I was building.  I just haven't got round to finding out more about it or a source for it.  You might want to spend some time at this though as I am sure it would answer a lot of 'smoothing issues'.  It is certainly durable and is really easy to rinse clean between jobs.

Wednesday, 13 May 2015

Small delay? or not......

Sometimes when building a project you think you have planned to the nth degree and then you hit the glaringly obvious ommission.  After a couple of days painting, drying and rubbing down all walls and ceilings and the door fronts I was joyously about to glue in the wall dividers which would, at last, give me rooms to 'go at'.  I then realised all three of them allow some glimpse of a space behind and I had 'forgotten' that I need to finish those spaces before gluing in the walls.


space behind wall
This is an example of what I mean. The floor and wall space to the left is the drawing room, floor space to the front right is the library and the floor and wall space back right is the service corridor.  I need to finish the service corridor floor and wall before gluing in the dividing walls.  As yet, I don't have any ideas let alone the materials to do this.  The whole of this floor goes on hold.

Similarly with the entrance hall below and the kitchen below that. They are all dependent on choice of finishes being made and bought.

For this particular service area I might scrape by with a dull colour painted wall and a painted grey (stone) flooring.  

On the floor below, the hall glimpsed beyond the door needs tiles and possibly the suggestion of a finished wall.  That said I am not convinced about leaving the inner hall door open even a little as it will knock the symmetry off balance and there isn't enough useful depth to suggest a staircase or room beyond??????

The kitchen and its various viewpoints offer another set of issues.

They will all also need some sort of light fitted (and I don't have those) before closing off the area for good.  Yes, I do have that sort of confidence in the lights.  If any do fail for some reason, then it will just be an unlit area!!  I cannot work out some complicated way of getting back in there once this is built.

I think that the whole project may go on hold until after the York show in June.  Not only can I (hopefully) buy everything I will need at the show, but I will also be visiting Fairfax House the day before and gathering a zillion ideas.  I might just use the intervening time to do some kit building, starting with the ELF linen press.